Call us: +86-137-2353-4866
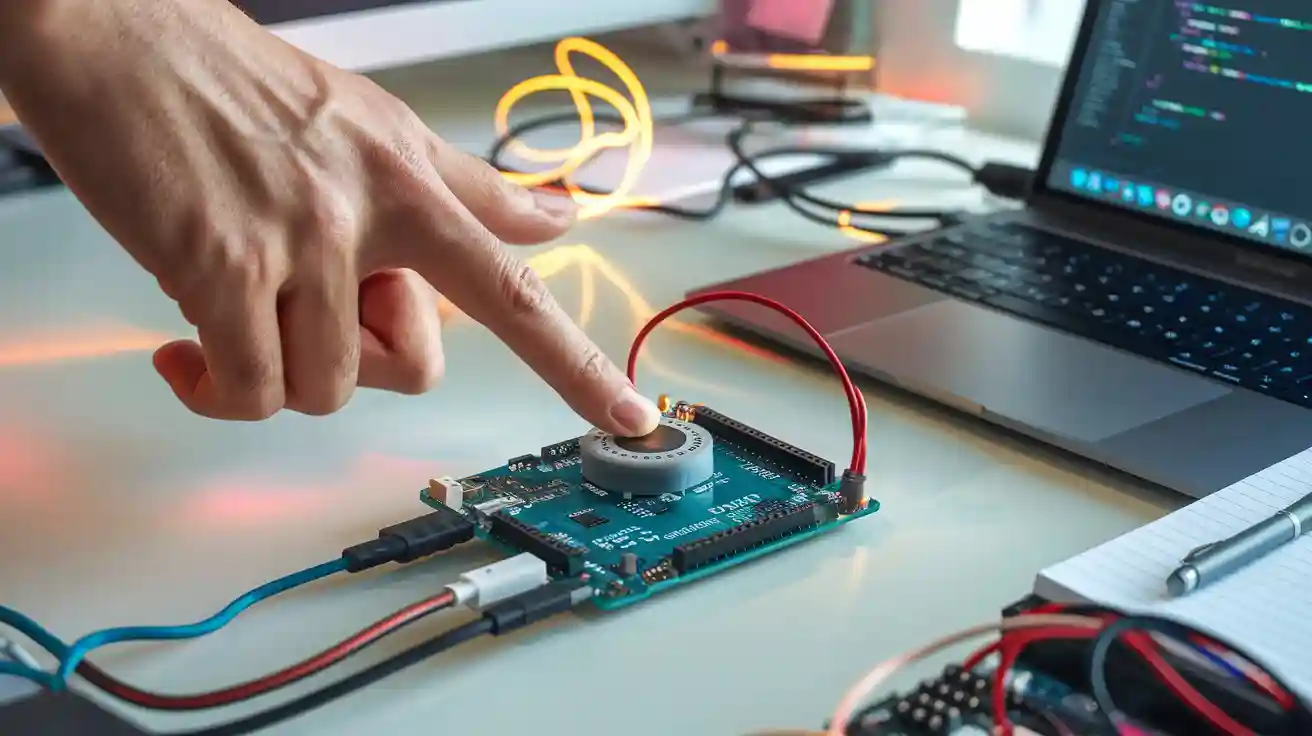
The world of electronics buzzes with excitement as inventors grab an fsr402 and an arduino to bring ideas to life. People love to press, squeeze, and poke things—so why not measure it? The force sensing resistor from SOUSHINE makes it easy.
- The Arduino-compatible market expects a 10.1% annual growth rate from 2025 to 2032.
- Experts predict the market will reach US$ 815.3 Million in 2025.
Curious minds can join this wave and start building today.
Key Takeaways
- The FSR402 sensor checks pressure by changing resistance. It does this when you press it. This helps you find out how much force is used.
- SOUSHINE FSR402 sensors are thin and bend easily. They use little energy. You can use them in cars, hospitals, and robots.
- To begin a project, collect the main parts. You need an Arduino board, FSR402 sensor, resistor, and jumper wires. These help you connect everything easily.
- Make a voltage divider circuit with the FSR402 and a resistor. This step is important for good readings. Connect the wires the right way to stop mistakes.
- Match the sensor’s readings to weights you know. This helps make the force measurements more correct.
- Use the Arduino IDE to send code to your board. The code lets you see sensor values. You can watch pressure changes on the FSR402 as they happen.
- Try fun ideas like pressure switches, smart scales, or game controllers. These projects use the FSR402 in cool and learning ways.
- Check your wires and connections often. This keeps your readings steady and helps the sensor work well.
Table of Contents
FSR402 Sensor Overview
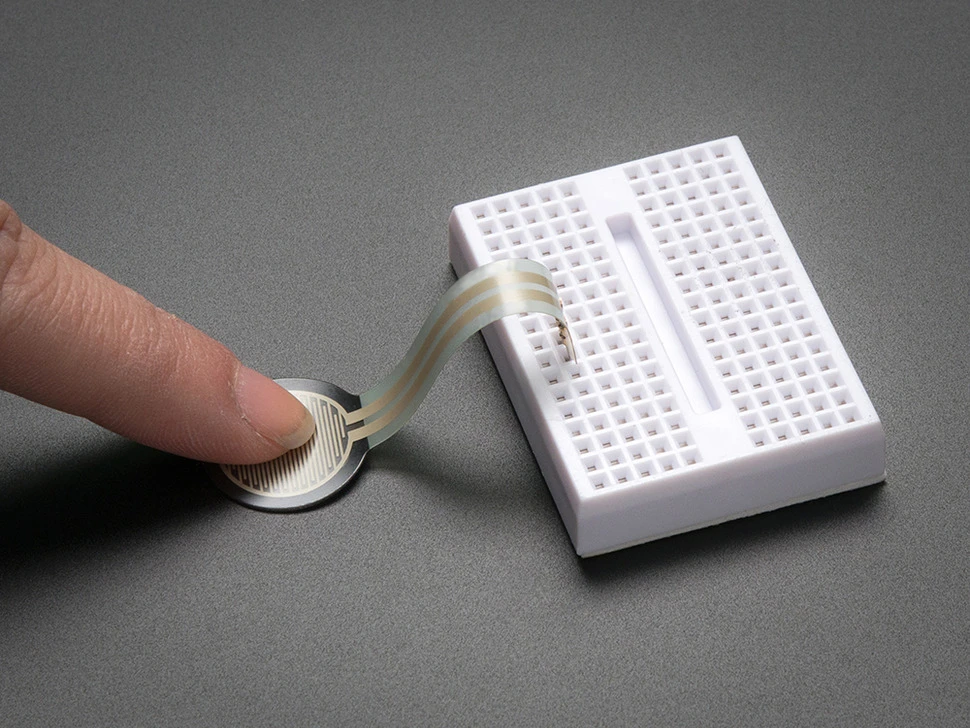
Force Sensitive Resistor Basics
How FSRs Work
A force sensitive resistor changes how much electricity it lets through when you press it. The fsr402 model has a thin film with tiny bits that conduct electricity. When you push on it, these bits touch each other more. This lets more electricity pass. The sensor shows a new value for each pressure level. So, it can tell how hard you press, not just if you press.
Key Features
The fsr402 is fast and can measure many force levels. It reacts in less than 1 millisecond. It can sense from 100 grams up to 10 kilograms. The sensor is very thin, less than 0.3 millimeters thick. Its working area is about 14.7 millimeters wide. The table below gives more facts:
| Specification | Value |
|---|---|
| Model | FSR FA402 |
| Dimension | 17.47mm x 18.3mm |
| Sensing dimension | Φ14.68mm |
| Force measuring range | 100g ~ 10KG |
| Thickness | ≤0.3mm |
| Force repeatable (single part) | ±2.5%, 8KG applied, 10 times |
| Force repeatable (part to part) | ±20% |
| Off resistance | 2MΩ |
| Hysteresis | 10% average |
| Response time | <1 ms |
| Working temperature | -30℃ ~ 60℃ |
| Connector | female 2.54mm / male 2.54mm / ZIF 1.0mm / 2.54mm |
SOUSHINE FSR Advantages
SOUSHINE makes its force sensitive resistors with two layers. The first layer has a pattern for the circuit. The second layer is a film with tiny particles. These particles are smaller than dust. When you press, they let more electricity go through. SOUSHINE uses a special ink to make the sensor last longer and work better.
Tip: SOUSHINE sensors are thin, bendy, and do not use much power. This helps them work in many places.
SOUSHINE FSRs are used in many areas. In cars, they check if someone is sitting or help with brakes. In healthcare, they watch how patients move or help with rehab tools. Robots use them to feel things or avoid hitting stuff. People use them in game controllers and smart home gadgets for better touch.
| Sector | Applications |
|---|---|
| Automotive | Seat detection, brake pressure sensors, haptic controls |
| Healthcare | Patient monitoring, rehab equipment, surgical tools, prosthetics |
| Robotics | Touch sensing for grasping, obstacle detection, navigation |
| Consumer Electronics | Touch controls, pressure-sensitive gaming, smart home appliances |
The fsr402 sensor from SOUSHINE lets makers easily add touch and pressure sensing to any arduino project.
Arduino Project Components
When you build a project with force sensitive resistors, you need many parts. Each part has its own job. The right tools make wiring the fsr easy. Here is what you need for a basic setup:
| S.no | Component | Value | Qty |
|---|---|---|---|
| 1. | Arduino UNO | – | 1 |
| 2. | USB Cable Type A to B | – | 1 |
| 3. | Force Sensor | – | 1 |
| 4. | Power Adapter for Arduino | 9V | 1 |
| 5. | Resistor | 10kΩ | 1 |
| 6. | Breadboard | – | 1 |
| 7. | Jumper Wires | – | 1 |
FSR402 Sensor (SOUSHINE)
The fsr402 sensor from SOUSHINE is the main part here. This sensor can take more than 10 million presses. It bends and moves but does not break. Makers like it because it works in many things, like wearables, robots, and game controllers. SOUSHINE is special for a few reasons:
- Big companies trust SOUSHINE FSR sensors to work well.
- The price is low, which helps with big projects.
- The sensor meets rules for the industry and gives good results.
| Feature | Description |
|---|---|
| Variable Resistance | The FSR-402 sensor’s resistance changes based on the pressure applied to it. |
| Voltage Divider Circuit Required | A voltage divider circuit is necessary to read the sensor’s output effectively. |
| Example Arduino Code Provided | The tutorial includes example code for measuring and interpreting the sensor’s output. |

Arduino Board
The Arduino board is like the brain of the project. It reads the sensor and figures out what the numbers mean. Most people use the Arduino Uno, but Nano and Uno R4 also work. Some use ESP32, ESP8266, or Raspberry Pi for more features.
| Arduino Board Models | Other Compatible Platforms |
|---|---|
| Arduino Uno | ESP32 |
| Arduino Nano | ESP8266 |
| Arduino Uno R4 | Raspberry Pi |
Wiring Parts
Jumper Wires
Jumper wires connect all the parts together. They are bright and snap into the breadboard. You usually need five wires.
Breadboard
The breadboard keeps the parts in place. It lets you test ideas without using solder. The small breadboard fits on any desk.
10kΩ Resistor
The 10kΩ resistor helps the Arduino read the sensor right. It goes in the voltage divider circuit and keeps the numbers steady.
USB Cable
The USB cable gives power to the Arduino and sends code from the computer. Type A to B works for most Arduino boards.
Tip: SOUSHINE FSR402 sensors cost less when you buy a lot. The price drops to $1.00 each, so classrooms and clubs can start building.
With these parts, anyone can wire the fsr and start making cool things.
FSR402 Arduino Wiring
Wiring the fsr can seem tricky at first. The voltage divider circuit is very important in these projects. Makers like this setup because it changes presses into numbers. The arduino can read these numbers. Let’s look at the steps and learn how to avoid mistakes.
Voltage Divider Setup
The voltage divider circuit works like a helper. It takes the fsr402’s changing resistance and makes a voltage. The arduino reads this voltage. It shows how hard someone presses.
Pin Connections
You need three main parts to wire the fsr: the fsr402, a 10kΩ resistor, and the arduino. The voltage divider circuit must be set up carefully. Here is how you connect them:
| Component | Connection Point |
|---|---|
| FSR402 Terminal 1 | 5V on Arduino |
| FSR402 Terminal 2 | Analog Pin (A0) |
| 10kΩ Resistor | Between A0 and GND |
- The voltage divider uses both the fsr402 and the 10kΩ resistor together.
- One end of the fsr402 goes to 5V.
- The other end connects to the analog pin and one end of the resistor.
- The other end of the resistor connects to ground.
Tip: The voltage divider with a 10kΩ resistor gives many voltage levels. When you press lightly, the voltage is close to zero. When you press hard, the voltage gets near 5V. This helps the arduino sense every press, from soft to strong.
Common Mistakes
Even people with experience can make wiring mistakes. The voltage divider circuit needs the right resistor. A 10kΩ resistor works for most uses. Some people use a lower value for bigger forces or a higher value for smaller forces.
- Soldering the fsr402 to jumper wires stops loose wires.
- Too much heat when soldering can break the sensor.
- If you skip the resistor or use the wrong one, the circuit may not work right.
Note: Always check your wiring before turning on the arduino. A small mistake can cause lots of problems.
Circuit Preparation
Before wiring, gather all your parts and set up the breadboard. Put the voltage divider circuit in the middle of the breadboard. Use jumper wires to connect each part to the arduino.
- Write down sensor values with no force to get a starting point.
- Put known weights on the fsr402 and watch the voltage change. This helps you make a calibration curve.
- Use a moving average filter in your code to make the data smoother.
- Put a soft pad on the sensor to spread out the force and keep the fsr402 safe.
- Try different resistor values to see which gives the best results.
- Check all wires and connections if the readings are not steady.
- Recalibrate the sensor sometimes, especially if it gets hotter or colder.
Makers who do these steps find wiring the fsr simple and steady. The voltage divider circuit helps the arduino measure every press and squeeze.
FSR Tutorial Code
Sample Arduino Code
Reading Analog Values
All good fsr tutorials begin with some code. The fsr402 can show you its data, but you must ask it the right way. Here is a simple example that works well. This code reads the sensor and shows the value on your computer. Anyone can copy this into the Arduino IDE.
// FSR402 Arduino Example: Reading Analog Values

const int fsrSensor = A0;   // FSR402 connected to analog pin A0
int fsrReading = 0;         // Variable to store sensor reading

void setup() {
  Serial.begin(9600);       // Start serial communication at 9600 baud
}

void loop() {
  fsrReading = analogRead(fsrSensor);  // Read the analog value from FSR402
  Serial.print("FSR Reading = ");
  Serial.println(fsrReading);          // Print the reading to the Serial Monitor
  delay(1000);                         // Wait for 1 second before next reading
}
Tip: This code works with any Arduino board. Plug the fsr402 into analog pin A0. The number changes when you press the sensor.
Code Upload Steps
Uploading code to the Arduino is like sending a message to a robot. Here are the steps to make the fsr402 send data:
- Connect the fsr402 sensor to the Arduino as shown earlier.
- Open the Arduino IDE on your computer.
- Copy and paste the code into a new sketch.
- Use a USB cable to connect the Arduino to your computer.
- Click the “Upload” button in the Arduino IDE.
- Open the Serial Monitor and set it to 9600 baud.
- Press the fsr402 sensor and watch the numbers change live.
Note: If the numbers do not change, check your wires and make sure you used the right analog pin.
Code Explanation
The fsr tutorial code may look hard, but each part is easy to understand. Here is a table that explains what each section does:
| Section | Function |
|---|---|
| Setup | Starts serial communication at 9600 baud so the computer can listen. |
| Reading Sensor Values | Uses analogRead to get the fsr402 value and sends it to the computer. |
| Calculating Voltage | Converts the sensor value to voltage (not shown in basic code, but easy to add). |
| Calculating Resistance | Finds out how much resistance the fsr402 has when pressed. |
| Calculating Conductance | Turns resistance into conductance, which helps measure force. |
| Calculating Force | Uses conductance to figure out how much force is on the sensor. |
| Displaying Readings | Shows all the numbers on the Serial Monitor for easy viewing. |
Pro Tip: To see the voltage, add this line after reading the sensor:
float voltage = fsrReading * (5.0 / 1023.0);
This gives you the voltage in volts.
The fsr tutorial code helps you see how hard you press. The Arduino reads the sensor, does the math, and shows the answer. You can change the code for your own project. The fsr402 is great for games, robots, and smart gadgets.
Testing and Troubleshooting
Sensor Reading Verification
Serial Monitor Use
The Serial Monitor in the Arduino IDE acts like a window into the world of your sensor. When someone presses the FSR402, numbers appear on the screen. These numbers change as the force changes. The Serial Monitor helps users see if the sensor responds to touch or pressure. If the numbers stay the same, something might be wrong.
Tip: Always start by checking the Serial Monitor after uploading your code. If the numbers move when you press, the sensor works.
Output Interpretation
Numbers on the Serial Monitor tell a story. A light press gives a small number. A hard press gives a bigger number. Users can make a table to match numbers to weights. This helps with calibration. Calibration means matching the sensor’s numbers to real-world forces. Each sensor acts a little differently, so calibration is important.
- Best practices for testing your fsr include:
- Calibrate each sensor for its job.
- Avoid pressing too hard to protect the sensor.
- Keep the sensor flat to get good readings.
- Watch out for temperature changes, which can change the numbers.
The Arduino sketch in this tutorial helps users see how much force they use. It turns the sensor’s numbers into force measurements. This makes it easier to understand what the sensor feels.
Common Issues
No Data
Sometimes, the Serial Monitor shows nothing. This can make anyone scratch their head. Here are some reasons:
- The sensor is not plugged in right.
- The code uses the wrong analog pin.
- The resistor is missing or in the wrong spot.
- The USB cable is loose.
Users should check each part. A quick look at the wiring often solves the problem.
Unstable Readings
Unstable readings can turn a fun project into a guessing game. The numbers jump around or change slowly. Here are some reasons:
- FSRs change over time. The resistance creeps, so numbers drift.
- If the weight moves, the numbers can change a lot—even by 27%.
- The shape of what presses on the sensor matters. A sharp object and a flat object give different numbers.
- To fix unstable readings:
- Press on the sensor the same way each time.
- Use a piston or a flat plate to spread out the force.
- Try 3D printing a holder for weights.
Note: Mount the sensor flat and avoid bending it. This keeps the readings steady.
Testing and troubleshooting help users get the most from their FSR402. With a little patience, anyone can turn numbers into real-world actions.
Force Sensitive Resistor Applications
There are many cool things you can do with force sensitive resistors. In 2025, makers want projects that are fun and teach new skills. The FSR402 sensor from SOUSHINE is perfect for these ideas. It changes a simple press into something that happens. Below are some project ideas that make you want to try them out.
Arduino Project Ideas
Pressure Switch
A pressure switch project uses the FSR402 to feel when someone presses down. The sensor works like a hidden button. When you press hard enough, the Arduino can turn on a light, start a fan, or open a door. This project is great for smart homes, toys, or science class.
Smart Scale
A smart scale project helps you measure weight in a fun way. The FSR402 goes under a flat surface. When you put something on top, the sensor feels the force. The Arduino figures out the weight and shows it on a screen. This project helps students learn about weight and how to measure it.
Game Controller
People who love games can make a game controller with the FSR402. The sensor hides under a button or handle. If you press harder, your game character can run faster or jump higher. The Arduino reads how hard you press and tells the computer. This makes games more exciting and lets you control things in new ways.
| Application Type | Integration Example | Description |
|---|---|---|
| Pressure Switch | FSRs can sense when you press on a surface. | This lets devices turn on by themselves when you press hard enough. |
| Smart Scale | FSRs can check weight by feeling the force you use. | This helps the scale show the right weight by sensing how much force is there. |
| Game Controller | FSRs can tell when you press buttons or surfaces. | This makes games better by letting you control things with how hard you press. |
Creative Uses
Makers always think of new things to build. The FSR402 sensor is used in many smart projects:
- Checks if a trash can is full so it does not overflow.
- Senses weight for smart recycling bins.
- Makes floor mats that know when someone steps on them.
- Turns on lights when someone walks into a room.
- Counts how many people walk into a store.
- Helps doctors watch patients’ movements.
- Makes buildings safer and controls who gets in.
- Helps older people with special tools.
Tip: Trying new things brings new ideas. Mix the FSR402 with lights, buzzers, or screens. Every project helps you learn something different.
The FSR402 sensor and Arduino help you learn and have fun. Every project starts with a simple press and can become something awesome. Makers in 2025 will use these tools to create the future.
Getting started with the FSR402 and Arduino feels like opening a door to invention. Makers can follow these simple steps:
- Connect the FSR402 and resistor to the Arduino.
- Upload the sketch and open the Serial Monitor.
- Place weights on the sensor and watch the numbers change.
- Calibrate by matching numbers to real forces.
Makers who want more can check out guides with wiring tips, calibration tricks, and project ideas.
For deeper dives, explore integration guides and research articles on force sensing.
The world waits for new ideas. SOUSHINE FSRs help every builder press start in 2025! 🚀
FAQ
How does the FSR402 sensor measure force?
The FSR402 sensor changes its resistance when someone presses it. The Arduino reads this change and shows a number. A bigger press gives a bigger number. The sensor does not measure exact weight but shows how hard someone presses.
Can the FSR402 sensor bend or flex?
Yes! The FSR402 sensor bends and flexes. Makers use it on curved surfaces or in soft objects. Just do not fold it sharply. Sharp bends can break the sensor.
What happens if someone presses too hard?
Pressing too hard can damage the sensor. The FSR402 works best with gentle to medium force. If someone uses too much force, the sensor may stop working.
Does the FSR402 need calibration?
Yes, calibration helps. Each sensor acts a little differently. Makers place known weights on the sensor and write down the numbers. This helps match sensor readings to real-world force.
Can the FSR402 detect multiple touches at once?
No, the FSR402 only senses force in one spot at a time. It cannot tell if two people press at once. For multi-touch, use more sensors.
What Arduino boards work with the FSR402?
The FSR402 works with Arduino Uno, Nano, and Uno R4. It also works with ESP32, ESP8266, and Raspberry Pi. Just connect the sensor to an analog pin.
How long does the FSR402 last?
The FSR402 lasts for millions of presses. Makers use it in projects that need many touches. The sensor keeps working as long as no one bends or presses it too hard.
Can someone use the FSR402 for water projects?
The FSR402 does not like water. Keep it dry. If water gets inside, the sensor may stop working. Makers use covers or cases to protect it.