Call us: +86-137-2353-4866
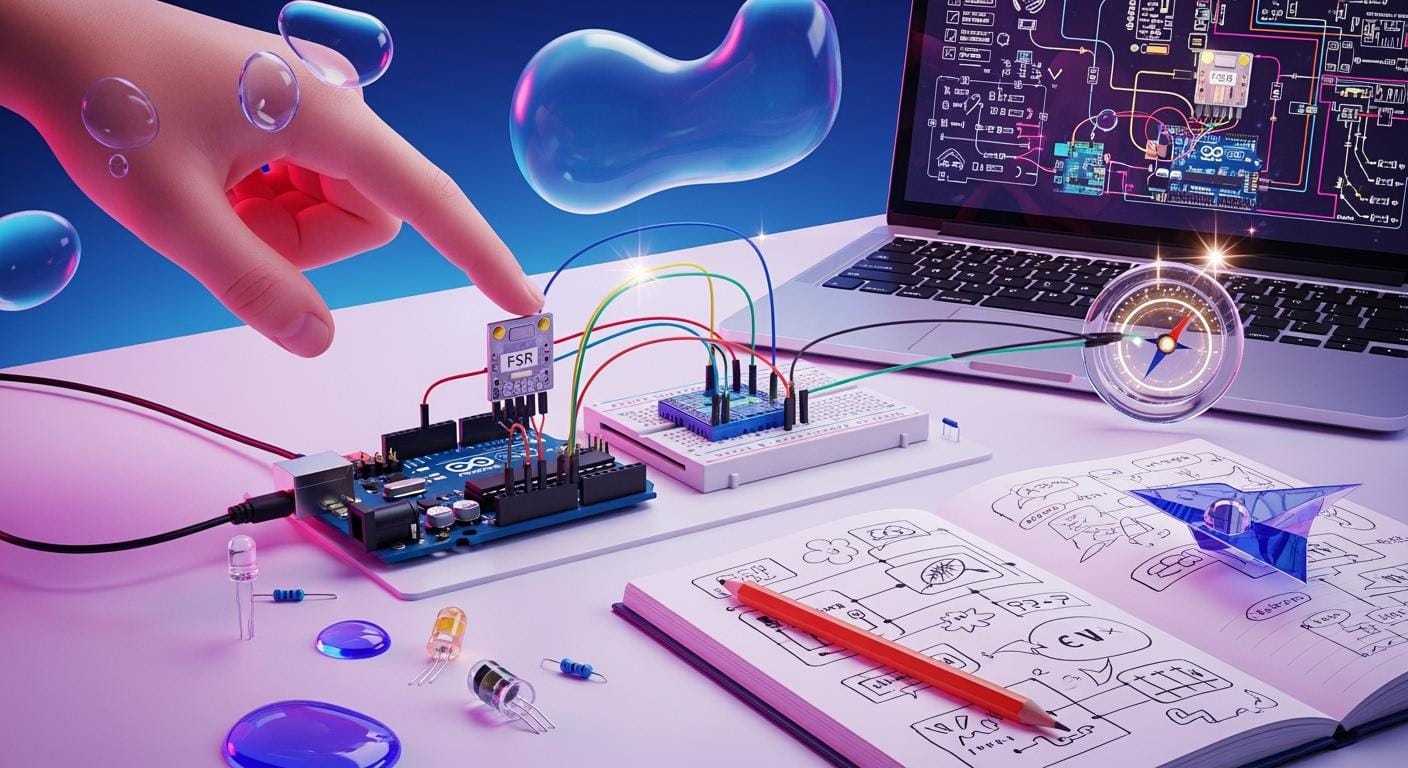
Ready to level up your creativity? Check out these top 5 Arduino FSR sensor projects for 2025:
- Smart Pressure Mat
- DIY Electronic Drum Pad
- Touch Night Light
- Smart Footbed with Arduino Force Sensor
- Interactive LED Controller
SOUSHINE brings you the force sensing resistor that makes every arduino fsr sensor project simple and fun. You can use force sensing in smart wearables, interactive art, and home automation.
Dive into the step-by-step guides and tips for each project. You can bring your ideas to life!
Table of Contents
Key Takeaways
- Try five fun Arduino FSR projects for 2025, like a smart pressure mat and a homemade electronic drum pad.
- Learn how force sensing resistors work by checking how resistance changes when you press on them.
- Pick SOUSHINE FSRs because they last long, can be changed to fit your needs, and cost less for your projects.
- Use easy guides to make projects that help with home automation, making music, and interactive art.
- Set up your FSRs the right way to get correct readings and make your projects work better.
- Add new ideas like smart wearables and AI to make your Arduino projects cooler and more helpful.
- Use online guides and help to connect, code, and fix problems with your Arduino FSR projects.
- Begin with easy projects to get better and feel sure before you try harder designs.
Arduino FSR Sensor Overview
Force Sensing Resistor Basics
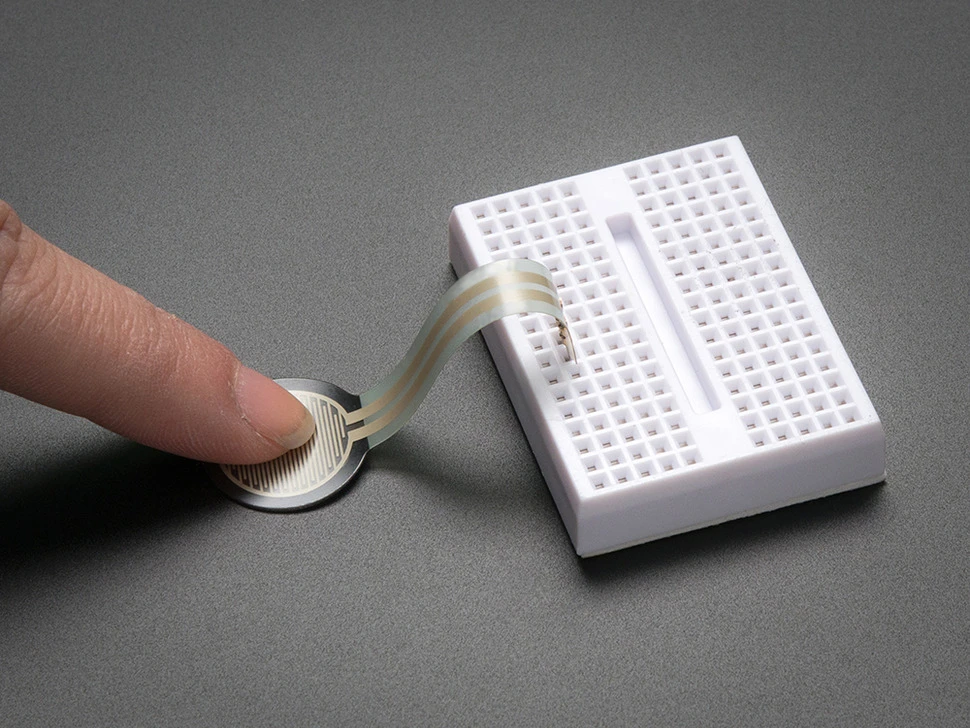
A force sensing resistor is a special sensor. It changes how much it resists electricity when you press it. If you press harder, the resistance goes down. This lets you measure how much force you use. The sensor is made with a simple design. It has a special material between two metal parts. When you push on it, the layers touch more. This makes the resistance drop. That is why it is great for projects that need to sense touch or pressure. People use it in devices that help with comfort or in rehab tools. It works well because it can feel a human touch.
The RP-S40-ST model can sense from 10 grams up to 10 kilograms. Most people use it between 20 grams and 1.1 kilograms for better results. You can change how sensitive it is by picking a different resistor. If you want to feel more force, use a lower resistor. For lighter touches, use a higher resistor. A 4.7kΩ resistor is good for about 1 kilogram.
How Arduino FSR Sensors Work
You can hook up a force sensing resistor to your Arduino easily:
- Attach one end of the sensor to an analog pin.
- Connect the other end to ground.
- Put a fixed resistor (like 10kΩ) from the analog pin to 5V.
- The Arduino checks the voltage at the analog pin. This voltage changes when you press the sensor.
Tip: Using a voltage divider helps you get smooth readings of force.
Here are the main ideas:
| Principle | Explanation |
|---|---|
| Voltage Divider Setup | The sensor and resistor make a voltage divider. |
| Resistance Change | Pressing the sensor lowers resistance and changes voltage. |
| Calibration Importance | You must calibrate the sensor to get correct readings. |
| Physical Structure | Two layers with a spacer. More pressure means more contact and less resistance. |
| Analog Voltage Reading | No force means high resistance and low voltage. More force means less resistance and more voltage. |

SOUSHINE FSR Features
SOUSHINE gives you more than just a regular sensor. It uses advanced technology for many projects. SOUSHINE FSRs come in many shapes and sizes. You can choose the one that fits your project. These sensors last a long time, even with daily use.
Here is what makes SOUSHINE special:
| Feature | SOUSHINE FSRs | Other Brands |
|---|---|---|
| Competitive Pricing | Good prices | Usually cost more |
| Customization | Many shapes and sizes | Not many choices |
| Quality Assurance | Strong quality checks | May not be as reliable |
| Technical Support | Help from start to finish | Little or no help |
You also get strong sensors and lots of ways to change your sensor:
| Feature | SOUSHINE’s FSRs | Competitors’ FSRs |
|---|---|---|
| Durability | Very strong | Not as strong |
| Customization | Many options | Not many options |
If you want a good arduino fsr sensor, SOUSHINE gives you quality, help, and choices. You can use these sensors in many arduino projects, like smart mats or interactive lights.
Top Arduino FSR Projects 2025
Smart Pressure Mat Project
Purpose
You can build a smart pressure mat to sense when someone steps on it. This mat helps you track movement or trigger actions in your home or workspace.
Fun and Usefulness
A smart pressure mat gives you many ways to use your arduino fsr sensor. You can set up alerts, control lights, or collect data. Here are some real-world uses:
- Alert caregivers when patients stand up to help prevent falls.
- Connect to smart home systems to turn on lights or boost security.
- Track foot traffic in stores to help with layout and planning.
You can use this project to make your home smarter or gather useful information.
Components (SOUSHINE FSR)
- Arduino board (Uno, Nano, or similar)
- SOUSHINE force sensing resistor (FSR)
- Jumper wires
- 10kΩ resistor
- Breadboard
- Thin foam mat or doormat
- Optional: Buzzer, LED, or relay for extra features
Steps Overview
- Place the fsr under your mat or doormat.
- Connect the fsr to your Arduino using a voltage divider with a 10kΩ resistor.
- Write a simple code to read the sensor value.
- Set a threshold in your code to detect when someone steps on the mat.
- Add actions, like turning on a light or sending a signal, when the mat senses pressure.
Tip: Test your mat with different shoes and weights to set the best threshold.
Success Tips
- Use a thin mat so the sensor can feel the pressure.
- Tape the fsr in place to keep it from moving.
- Try adding more sensors for a bigger mat or more zones.
- Calibrate your sensor for each new location.
DIY Electronic Drum Pad
Purpose
You can make your own drum pad that reacts to your touch. This project lets you play sounds or control music software with your hands.
Fun and Usefulness
A DIY drum pad is a great way to learn about sound and rhythm. You can use it to make music, practice drumming, or even control games. Many arduino projects use this idea for fun and learning.
Components (SOUSHINE FSR)
- Arduino board
- SOUSHINE fsr
- 10kΩ resistor
- Breadboard and jumper wires
- Foam or rubber pad (for the drum surface)
- Speaker or computer with audio software
Steps Overview
- Attach the fsr under your drum pad surface.
- Connect the fsr to your Arduino with a voltage divider.
- Write code to read the force from the sensor.
- Map the sensor value to a sound or MIDI note.
- Play the drum pad and hear the sound change with your touch.
Note: You can use more sensors to make a full drum kit.
Success Tips
- Use a soft pad to protect the sensor and get better response.
- Secure the fsr so it does not slide.
- Adjust your code to match your playing style.
- Try different pad materials for new sounds.
Touch Night Light Project
Purpose
You can build a night light that turns on with a gentle touch. This project uses a force sensor resistor to make a simple and useful gadget.
Fun and Usefulness
A touch night light is easy to use. You just tap or press the sensor to turn the light on or off. This project is perfect for bedrooms, hallways, or kids’ rooms.
Components (SOUSHINE FSR)
- Arduino board
- SOUSHINE fsr
- 10kΩ resistor
- LED or small lamp
- Breadboard and jumper wires
- Power supply
Steps Overview
- Connect the fsr to your Arduino using a voltage divider.
- Attach the LED or lamp to a digital output pin.
- Write code to read the sensor and turn the light on when you press the sensor.
- Add a delay or toggle feature for better control.
- Place the sensor where you want easy access.
Tip: Hide the sensor under fabric or a soft cover for a smooth look.
Success Tips
- Calibrate the sensor so it only turns on with a real touch.
- Use a bright LED for better light.
- Test the sensor spot to find the best place for your hand.
- Try adding more lights for extra glow.
Here is a quick look at trends for arduino fsr sensor projects in 2025:
| Trend | Description |
|---|---|
| Innovations in smart wearables | Arduino helps you build smart clothing and gear that track movement and touch. |
| Adoption of AI in edge devices | Arduino boards now use machine learning for real-time data and smarter actions. |
| Integration with voice assistants | You can connect Arduino to voice assistants for new ways to control your projects. |
| Adoption in developing countries | Arduino gives more people a way to create tech for farming, energy, and education. |
You can see how these trends make your projects more exciting and useful.
Smart Footbed with Arduino Force Sensor
Purpose
You can build a smart footbed to measure pressure under your feet. This project helps you track steps, balance, or weight shifts. You can use it for fitness, sports, or health monitoring.
Fun and Usefulness
A smart footbed lets you see how you walk or stand. You can use it to improve your running or check your balance. Many people use this kind of project in sports training or physical therapy. You can even use it to make games that react to your steps.
Components (SOUSHINE FSR)
- Arduino board
- SOUSHINE fsr (multiple, for each foot area)
- Thin foam or shoe insole
- Jumper wires
- 10kΩ resistors
- Breadboard or small PCB
- Battery pack (for portable use)
Steps Overview
- Place the fsr sensors under the insole at key points like the heel and toe.
- Connect each sensor to your Arduino using a voltage divider with a 10kΩ resistor.
- Write code to read the pressure from each sensor.
- Store or send the data to your computer or phone.
- Use the data to track steps, balance, or pressure changes.
Tip: Try using more sensors for better detail. You can map pressure across the whole foot.
Here’s why SOUSHINE fsr sensors work well for this project:
| Benefit | Description |
|---|---|
| High Sensitivity | You get accurate force readings for each step. |
| Durability | The sensors last through many uses, even daily walking. |
| Versatility | You can pick different shapes and sizes for any shoe or footbed. |
| Low Power Consumption | The sensors use little power, so your battery lasts longer. |
| Application Range | You see these sensors in healthcare, sports, and consumer electronics. |
Success Tips
- Use thin foam so the sensors feel the pressure from your foot.
- Tape or glue the sensors in place to keep them from moving.
- Calibrate each sensor for your weight and shoe type.
- Test the footbed by walking and standing to check the readings.
Interactive LED Controller
Purpose
You can make an interactive LED controller that changes lights when you press or squeeze a sensor. This project lets you control colors, patterns, or brightness with your touch.
Fun and Usefulness
An interactive LED controller adds fun to any room or project. You can use it for mood lighting, games, or art displays. Many arduino projects use this idea to make lights respond to touch or pressure.
Components (SOUSHINE FSR)
- Arduino board
- SOUSHINE force sensing resistor
- 10kΩ resistor
- Breadboard and jumper wires
- RGB LED strip or single LEDs
- Power supply
Steps Overview
- Connect the force sensor resistor to your Arduino using a voltage divider.
- Attach the LED strip or LEDs to digital output pins.
- Write code to read the sensor value.
- Map the sensor reading to LED brightness or color.
- Press or squeeze the sensor to change the lights.
Try using more than one sensor for different effects. You can control multiple colors or patterns.
Success Tips
- Place the sensor where it is easy to reach.
- Use a soft cover over the sensor for comfort.
- Adjust your code to match how hard you want to press.
- Test different LED patterns for the best look.
Getting Started with Force Sensitive Resistor Projects
Choosing SOUSHINE FSRs
When you pick a SOUSHINE force sensing resistor for your arduino fsr sensor project, you want to make sure it fits your needs. You should look at a few important factors before you start. The table below shows what experts recommend:
| Factor | Description |
|---|---|
| Calibration | Set a baseline, test with weights, and use software filters. |
| Circuit Design | Add protective covers and choose the right resistor for steady results. |
| Handling Non-Linearity | Use mapping or lookup tables for better accuracy. |
| Debugging Issues | Check your wiring and recalibrate often to keep readings correct. |
You can get SOUSHINE FSRs in many shapes and sizes. This helps you match the sensor to your project. If you want help, SOUSHINE offers support to guide you through setup and calibration.
Tools and Materials
You need the right tools and materials to build your projects. Here’s a list to help you get started:
- 1x 40mm force sensing resistor
- 1x 4.7kΩ resistor
- 1x Arduino Uno board
- 5x jumper wires (male-to-male)
- 1x mini breadboard
- 1kg calibrated masses kit
You may also want these tools for assembly and testing:
- Soldering iron
- Hot glue gun
- Knife or razor
- Wire cutter
Tip: Keep your workspace clean and organized. This makes building and testing your sensor easier.
Arduino Setup Guide
You can set up your arduino and force sensor resistor in a few simple steps. Follow this guide to get started:
- Connect the FSR to your Arduino using a voltage divider. This lets the Arduino read changes in resistance when you press the sensor.
- Upload code to your Arduino that reads and displays resistance values from the FSR. Make sure your code matches your calibration setup.
- Calibrate your sensor. Place known weights on a flat piece over the FSR. Write down the resistance value for each weight. Use these numbers to make a chart or line for your readings.
Here’s a quick checklist for your setup:
- Arduino Uno
- SOUSHINE FSR
- 10kΩ resistor
- Breadboard
- Jumper wires
- Open the Arduino IDE and paste your sample code into a new sketch.
- Connect your Arduino board to your computer with a USB cable.
- Select the correct board and port in the IDE.
- Click upload to send the code to your Arduino.
- Open the serial monitor to see resistance values. Press the sensor and watch the numbers change.
If you want more help, look for a force sensing resistor tutorial online. Many guides show you how to connect, code, and calibrate your sensor step by step.
Finding Tutorials
You can find many helpful guides online when you want to start your own arduino project with a force sensor. These tutorials walk you through each step, from wiring to coding. Here are some great places to begin:
- Arduino Pressure Sensor (FSR) With LCD Display
This guide shows you how to build a pressure sensor project that displays readings on an LCD. You get a full parts list, including the arduino board, breadboard, LCD, potentiometer, and jumper wires. - Parts List and Setup
The tutorial gives you every component you need. You see clear pictures and diagrams for each step. - Step-by-Step Instructions
You follow easy directions to connect the sensor, wire the circuit, and upload the code to your arduino. - Sample Code and Calibration
The guide includes code snippets. You also get links to more resources for calibrating and testing your sensor.
Tip: Always look for tutorials that include both wiring diagrams and code. This helps you avoid mistakes and learn faster.
You can also search for video guides if you like to watch someone build the project. Many creators share their arduino sensor builds on YouTube and maker forums.
Safety and Troubleshooting
You want to stay safe and solve problems quickly when working with arduino and sensor circuits. Here are some important safety tips:
- Use the right power supply for your arduino. Do not use high-voltage sources or batteries with the wrong voltage.
- Check your wiring. Make sure all connections are secure and match the pin layout.
- Handle all parts with care. Discharge static electricity before you touch any sensor or board.
- Use a breadboard for testing. This lowers the risk of short circuits.
- Turn off the power before you change anything in your circuit.
- Keep your arduino and sensor away from water or liquids.
- Watch for parts that get hot. If something feels too warm, stop and check your setup.
- Follow guides that include safety steps.
- Ask a teacher or adult for help if you feel unsure.
Note: Safety comes first. Take your time and double-check your work.
If you run into problems, use this table to help you troubleshoot common issues:
| Challenge | What to Do |
|---|---|
| Inaccurate Readings | Check your connections and calibrate again. |
| No Change in Resistance | Look for broken wires or a damaged sensor. |
| Drifting Values | Temperature may affect readings. Adjust in software. |
You can fix most problems by checking your wiring and calibrating your sensor. If you still have trouble, try a different tutorial or ask for help in an online forum.
Arduino Force Sensor Applications
Robotics and Automation
You can use an arduino and a force sensor to make robots move. These parts help you build machines that react when you touch or press them. In 2025, more robots are in schools, clubs, and jobs. Here are some ways you might use them:
- The FSR408 force sensor can measure force from 100 grams to 10 kilograms. You get good readings for many jobs.
- Robotics clubs use these sensors to teach students how to build and code robots.
- Companies use them in training to show how machines feel and react to pressure.
- The sensor helps you control robot arms, grippers, and wheels with better accuracy.
You can make your robot smarter and more fun with these simple tools.
Healthcare Devices
You see arduino force sensors in many healthcare tools. These sensors help people get better, stay safe, and feel good. Here are some ways you might find them:
- SOUSHINE’s sensors make prosthetics work better. They help users feel more comfortable and in control.
- Hospitals put these sensors under mattresses. Nurses can check if a patient gets up or moves.
- Rehab devices use the sensors to test grip strength. Patients get feedback right away to help them improve.
You can use these sensors to make healthcare tools that help both patients and nurses.
Consumer Electronics
Force sensors and arduino boards are in many gadgets you use every day. They help you use devices in new ways. Look at this table to see where you might find them:
| Application Area | Description |
|---|---|
| Educational Projects | You can learn about force and electronics by making simple projects with these sensors. |
| Robotics | Robots use sensors to feel pressure and interact with things around them. |
| Calibration Techniques | You use weights to set up the sensor for better readings. |
| Slim Profile Measurements | The sensor fits in small spaces, so it works well in tiny devices that need pressure data. |
You can try new ideas and build your own smart gadgets with these easy parts.
Industrial Uses
Arduino and sensor technology are changing how factories work. When you use a force sensing resistor, you can measure pressure in machines. This helps you control equipment and keep things working well.
Many companies use arduino sensors for testing machines. You can check how much force a machine uses or if a part fits. Some factories use car occupancy sensors to see if someone is in a seat. This helps keep people safe and makes sure things work right.
You might see resistive touch-pads on control panels. Workers can press buttons or screens with a light touch. Robotic fingertips use sensors to grab and move things. Artificial limbs can use sensors to feel pressure and work better for people.
Here are some ways arduino force sensing resistor systems are used in industry:
- Car occupancy sensors
- Resistive touch-pads
- Robotic fingertips
- Artificial limbs
- Keypads for machines
- Foot pronation systems
- Electronics inside tools
- Testing and measurement equipment
- OEM kits for new products
- Portable electronics for field work
- Sports equipment for training
- Augmented reality systems in training
- Mobile interaction for workers
These sensors help in many different ways. For example, a keypad with a sensor can control a machine. If you press harder, the machine does something different. In sports, trainers use foot pronation systems to see how athletes move. This helps them get better and avoid injuries.
Factories use electronics with arduino boards to watch machine health. A sensor can warn you when something needs fixing. This keeps machines running and saves money.
Here’s a table that shows how arduino sensor systems are used in different jobs:
| Industry | Application Example | Benefit |
|---|---|---|
| Automotive | Car occupancy sensor | Safety and tracking |
| Manufacturing | Testing equipment | Quality control |
| Robotics | Robotic fingertips | Better grip and movement |
| Healthcare | Artificial limbs | Improved user experience |
| Sports | Foot pronation system | Training and injury prevention |
You can use arduino and sensors to make your workplace smarter. Try building a simple tester or add a touch-pad to a control panel. You will learn how machines react to force and touch. This helps you fix problems and make new things.
Tip: Start with a small project. Use a sensor to measure force in a tool or machine. You can make your system bigger as you learn more.
You can find arduino sensor systems in many places. They help you work faster, safer, and smarter.
You explored five fun projects with SOUSHINE FSRs and arduino. Each project gives you a new way to use touch and pressure in your designs. You can build a smart mat, drum pad, night light, footbed, or LED controller. These projects help you learn and create.
Here’s what users say about SOUSHINE FSRs:
| Benefit | Description |
|---|---|
| Durability | Panels last through millions of presses. |
| Easy Cleaning | Surfaces wipe clean for better hygiene. |
| Customization | You can change designs to fit your ideas. |
| Cost-Effectiveness | Panels cost less, so you can build more projects. |
Try building one project. Share your results or ideas in the comments. You make learning easy and fun with SOUSHINE FSRs.
FAQ
How do I connect a SOUSHINE FSR to my Arduino?
You connect one end of the FSR to an analog pin and the other to ground. Add a resistor to create a voltage divider. This setup lets your Arduino read changes in pressure.
Can I use an Arduino force sensor circuit for more than one project?
Yes, you can reuse your circuit for different projects. Just change the code or the way you use the sensor. This makes it easy to try new arduino project ideas.
What is the best way to calibrate my FSR?
You place known weights on the sensor and record the readings. Use these numbers to adjust your code. Calibration helps you get accurate results every time.
Where can I find an arduino pressure pad tutorial?
You can find many tutorials online. Search for guides with clear steps and pictures. These resources help you build your own pressure pad quickly.
How long do SOUSHINE FSRs last?
SOUSHINE FSRs last through many presses. You can use them daily in your projects. Their strong build means you do not need to replace them often.
Can I use more than one FSR in a single project?
Yes, you can use several FSRs at once. Connect each sensor to a different analog pin. This lets you measure pressure in many spots at the same time.
What tools do I need to start with FSR projects?
You need an Arduino board, SOUSHINE FSR, resistors, jumper wires, and a breadboard. A computer helps you upload code. Basic tools like a wire cutter and screwdriver are useful.
Do I need to know coding to use an FSR with Arduino?
You need to write simple code to read the sensor. Many tutorials give you sample code. You can start with basic programs and learn as you go.