Call us: +86-137-2353-4866
Choosing the right Arduino touch panel depends on what you need. Some people like capacitive panels because they respond quickly. These are common in devices people use every day. Others pick resistive panels for more accurate touches. These work well if you need to wear gloves. This is important in factories or work sites. Price is also important. Resistive screens usually cost less money. The place where you use the panel matters, too. SOUSHINE has a touch panel for many uses. It helps people choose the best one for their needs.
Table of Contents
Key Takeaways
- Resistive touch panels cost less and work with gloves. They are good for factories and outside places.
- Capacitive touch panels react fast to light touches. They let you use more than one finger at a time. This makes using them more fun.
- Pick resistive panels for projects that need to last in tough places. These places can be factories or outdoor kiosks.
- Capacitive panels are best for things people use every day. They show clear pictures and work fast on phones and tablets.
- Think about where you will use the panel. Resistive panels do better with dirt and wetness than capacitive ones.
- SOUSHINE touch panels have cool features and work with many Arduino boards. This makes setting them up simple.
- Look at what your project needs, how much money you have, and what features you want before you pick a touch panel.
- Always make sure your Arduino board works with the panel. This helps everything work right.
Arduino Touch Panel Overview
Resistive
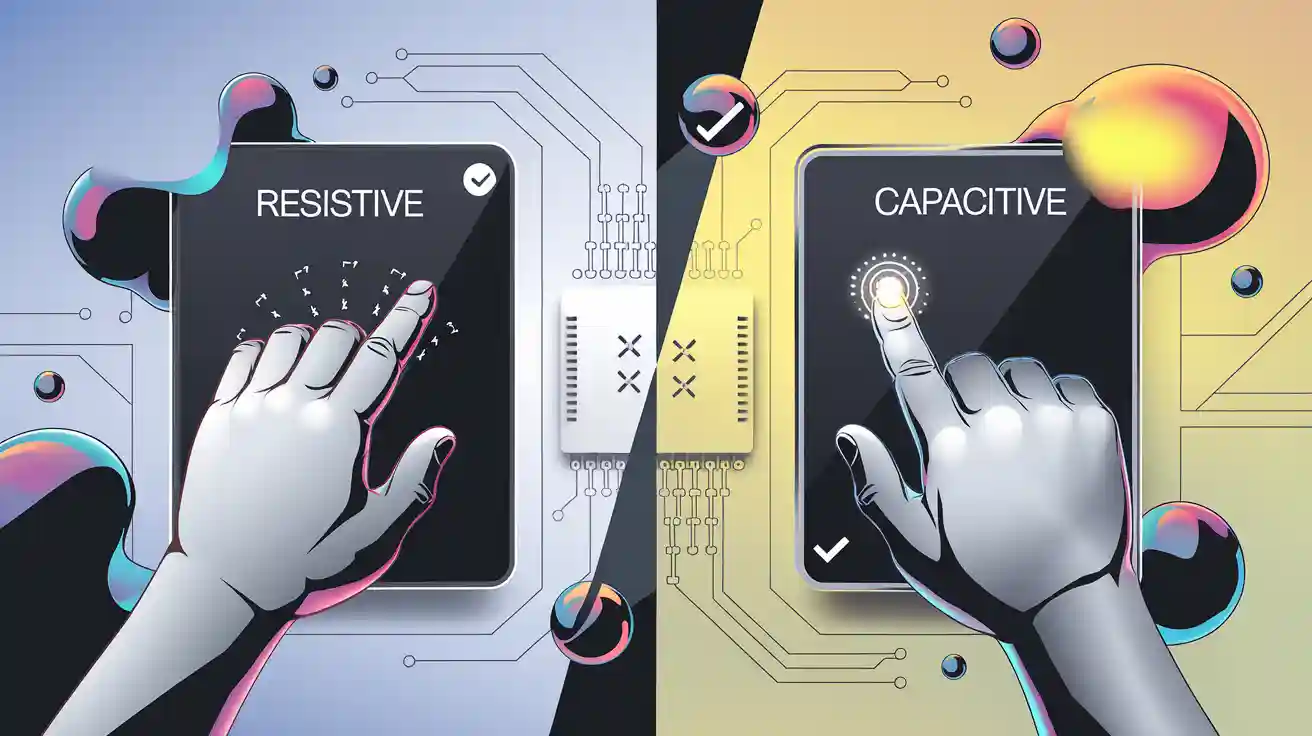
Resistive touchscreens work when you press down on them. The panel has two layers that conduct electricity. There is a small space between these layers. When you push the screen, the layers touch each other. This makes a change in voltage. The controller checks this change to find where you touched. You can use gloves or a stylus with this type. Many old devices and machines use resistive panels. They last a long time and do not cost much. These panels cannot do multi-touch gestures. People use them where strong and simple screens are needed.
Capacitive
Capacitive touchscreens sense your touch by using an electric field. The top has a grid made of clear wires. When your finger gets close, it changes the field. The controller finds out where you touched. Projected capacitive panels have rows and columns to help find touches better. This setup lets you use more than one finger at once. The glass top makes these panels tough. Phones, tablets, and new kiosks use capacitive panels. These panels do not work well with gloves or regular styluses unless made for that.
Tip: Projected capacitive panels are clearer and let you use more fingers. This makes them good for new and advanced uses.
Key Differences
| Feature | Resistive Touchscreen | Capacitive Touchscreen (Projected Capacitive) |
|---|---|---|
| Operation | Pressure-based | Electrical field disturbance |
| Multi-Touch | No | Yes |
| Glove/Stylus Use | Yes | No |
| Durability | Good in harsh settings | Strong glass surface |
| Visual Clarity | Lower | Higher |
| Common Applications | Industrial, office | Consumer electronics, kiosks |
- Resistive panels work well in tough places and with any pointer.
- Projected capacitive panels are clearer and let you use more fingers.
- Capacitive panels are fast but do not work well with wet hands or gloves.
- Resistive panels need pressure and cannot do fancy gestures.
You should pick resistive or projected capacitive touchscreens based on your project. Some people like resistive panels because they work with gloves and last long. Others want projected capacitive panels for speed and using many fingers.
Arduino Touch Panel Applications
Consumer Electronics
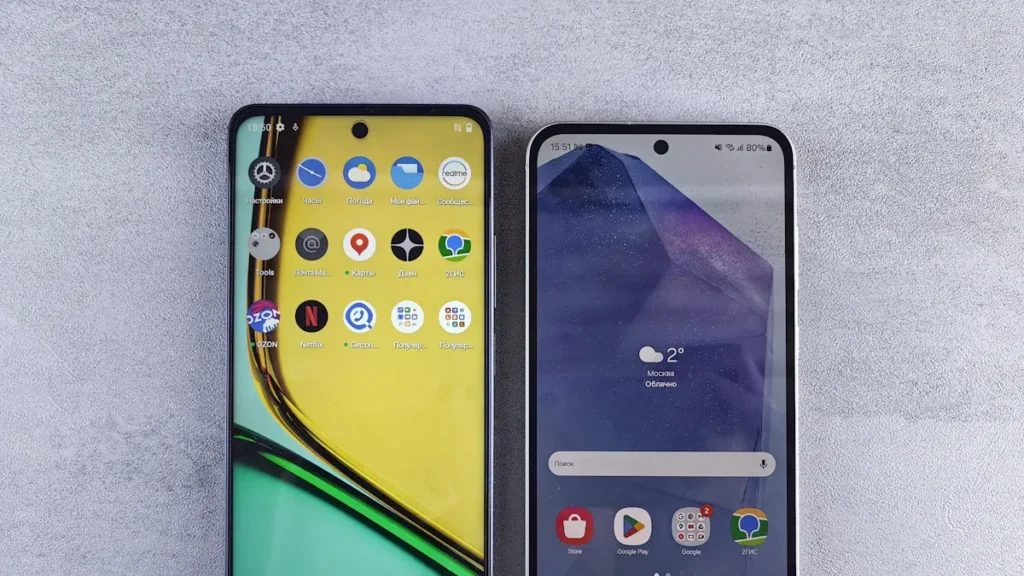
Touch panels are used in many electronics people use daily. Devices like smartphones and tablets need these panels for input. Capacitive panels are common because they react fast and let you use more than one finger. You can swipe, tap, and zoom easily. These things make devices simple for everyone. Some game consoles and handheld gadgets use touch panels for controls. Kids play learning games on touch screens. These panels help more people use technology.
Industrial Use
Factories and work sites need strong control systems. Both resistive and capacitive touch panels are important here. Workers use them to run machines and check data. They also help manage different jobs. The table below shows how Arduino touch panels are used in industry:
| Application Type | Description |
|---|---|
| Point of Sale Systems | Used in stores for buying and selling. |
| Home Automation Systems | Control smart home gadgets. |
| Medical Devices | Watch patient health with these systems. |
| Industrial Control Panels | Control machines and equipment. |
Resistive panels work well in tough places. Workers can use gloves or styluses with them. Capacitive panels react quickly and show clear pictures. This helps when speed and accuracy are needed. SOUSHINE touch panels have both types. They work for many jobs in factories.
Home and Office
People use Arduino touch panels to control things at home and work. These panels connect to an Arduino board. You can turn lights on or off by touching the screen. The system sends commands wirelessly to devices. A decoder reads the commands and does the right job. This makes it easy to control lights, fans, or other things from one spot. Offices use touch panels for meeting rooms or smart desks. These examples show how touch panels make homes and offices better.
Note: SOUSHINE touch panels work in many places. Their design lets you use them for small gadgets or big factory systems.
Retail and Kiosks
Retail stores and kiosks use Arduino touch panels to help customers. These panels make buying things faster and easier. Many stores put touch panels at checkout counters. Cashiers use them to scan items and take payments. Customers can use the screens to pay or check prices. They also get product info from the touch panel.
Kiosks are in places like malls, airports, and restaurants. People use them to order food or buy tickets. Some use them to find directions. The touch panel is the main way to control these machines. It reacts fast to taps and swipes. This lets people finish tasks without waiting for help.
Resistive touch panels are good for kiosks that need tough screens. Workers clean these screens a lot. The panels still work after many uses. People can use gloves or styluses on them. This helps in outdoor kiosks or cold places.
Capacitive touch panels are found in new retail systems. These panels sense light touches and let you use more than one finger. Customers can zoom in on pictures or scroll through menus. The glass top stays clear and does not scratch easily. Stores pick capacitive panels because they are fast and show sharp images.
SOUSHINE touch panels work well for many retail and kiosk jobs. They use new technology to give users a smooth time. The glass cover does not scratch and keeps the screen looking nice. Stores and builders like SOUSHINE panels because they are strong and easy to set up.
Tip: Touch panels in kiosks help people find what they want. They do not need to ask for help. This saves time for customers and workers.
Retailers use Arduino touch panels in smart POS systems. These systems have touch screens, card readers, and printers. The touch panel lets workers and customers use the system. People tap the screen to pick items or enter codes. They can also confirm payments. This makes the process easy and quick.
Kiosks use touch panels to give out information. Visitors tap the screen to see maps or schedules. They can also check product details. The panel answers right away, so the experience is smooth. Touch panels help stores and kiosks serve more people faster.
- Touch panels in retail and kiosks:
- Make transactions faster
- Help customers better
- Show product info
- Let people do things by themselves
- Work in many places
SOUSHINE’s touch panels are good for many retail and kiosk projects. They work with Arduino boards and other systems. Builders pick them because they are strong and easy to use. Touch panels help stores and kiosks meet customer needs every day.
Pros and Cons of Resistive Touchscreens
Pros
Cost
Resistive touchscreens are a good choice for saving money. Many people pick them because they do not cost much. These screens help keep project costs low. Schools and small shops use them to spend less.
Glove Use
Resistive screens work even if you wear gloves or use a stylus. This is helpful in cold places or at work sites. The table below shows how each panel works with gloves:
| Touch Panel Type | Compatibility with Gloves/Styli |
|---|---|
| Capacitive | Doesn’t work with gloves or stylus |
| Resistive | Works with gloves or stylus |
People in factories and outside use resistive screens a lot. They do not have to take off gloves or use special pens.
Rugged Environments
Resistive touchscreens work well in rough places. Many tough devices use them because they can handle dirt and water. You can use your finger, a stylus, or gloves on these screens. Here are some ways they are strong:
- Resistive touchscreens work in dirty, wet, and rough places.
- They do not break easily if dropped.
- Workers can use gloves, which helps on job sites.
- These screens do not scratch easily and last a long time.
Resistive panels are great for outdoor and work projects where you need something strong.
Cons
Sensitivity
Resistive touchscreens need you to press down to work. You must push the screen to make it respond. Capacitive screens react faster and need only a light touch. Here is how they compare:
- Resistive screens need pressure from anything.
- Capacitive screens sense your finger without pressure.
- Capacitive screens are quick and let you use more than one finger.
- Resistive screens are tough but not as sensitive.
Multi-Touch
Resistive touchscreens cannot do multi-touch moves. They only notice one touch at a time. This means you cannot zoom or swipe with two fingers. Here are some limits:
- Resistive screens only see one touch spot.
- Multi-touch needs extra parts or programs.
- You cannot do fancy moves easily.
Clarity and Durability
Resistive screens might not look as clear as capacitive ones. Their layers can make the screen less bright and sharp. Pushing on the screen a lot can wear it out. The table below shows some main features:
| Feature | Description |
|---|---|
| Resolution | 480×272 pixels |
| Brightness | 1,000 nits, sunlight readable |
| Color Reproduction | Good color and image consistency |
| Touch Panel Type | 4-wire resistive, supports basic interaction |
| Environmental Durability | Works in many conditions, suitable for indoor and outdoor projects |
Resistive touchscreens are strong and work in tough places. But they might not last as long if used a lot.
Note: Knowing the good and bad sides of resistive touchscreens helps you pick the right one for your project.
Capacitive Pros and Cons
Pros
Sensitivity
Capacitive touchscreens can sense your finger without any pressure. You just tap or swipe, and the screen reacts fast. This makes Arduino touch panels easy to use. You do not need a stylus or to press hard. People like how simple it is.
- You do not need to press down for capacitive screens.
- They react quickly to gentle touches.
- Every tap feels smooth and easy.
Multi-Touch
Multi-touch lets you use more than one finger at once. This helps you zoom in, turn things, or do other moves. Arduino projects are more fun with multi-touch. Makers can make sensors in many shapes and sizes. The Multi-Touch Kit works with most Arduino boards.
- Multi-touch sensors let you do cool moves.
- You can try out different sensor designs.
- The kit is good for both new and skilled makers.
Durability
Capacitive panels have strong glass on top. The glass does not scratch easily and lasts a long time. It keeps the touchscreen safe from harm. This makes capacitive panels good for busy places and kiosks. The screen stays clear even after lots of use.
Note: SOUSHINE touch panels use special glass to make them even stronger.
Design
Capacitive panels look stylish and new. The glass top looks clean and smooth. The screen shows bright colors and clear pictures. Designers pick capacitive panels for nice-looking products. These panels fit well in electronics and kiosks.
Cons
Cost
Capacitive touchscreens cost more than resistive ones. The fancy technology and glass make them pricier. The table below shows prices for different types and sizes.
| Type of Touch Panel | Size/Resolution | Price Range |
|---|---|---|
| Capacitive | 4-inch 480×480 | $90.40 – $104.08 |
| Capacitive | 3.5″ | $51.12 – $59.21 |
| Capacitive | 7″ 480×800 | $127.08 – $133.40 |
| Resistive | 2.4″ 240×320 | $14.06 – $16.19 |
| Resistive | 2.8″ 240×320 | $19.45 – $23.28 |
| Resistive | 7″ 800×480 | $120.07 |
| Resistive | 10.1″ HDMI | $195.12 |

Glove/Water Issues
Capacitive touchscreens work best with bare fingers. Gloves block the electric field, so the screen might not work. Special gloves help, but normal gloves do not. Water on the screen can also cause trouble. A few drops may be okay, but too much water makes it worse. You can use a special coating or water setting to help.
- Bare fingers work best on these screens.
- Special gloves can help the screen sense touch.
- Water can make the screen work less well.
Tip: For wet or outdoor places, use screen covers and special gloves.
The good and bad sides of capacitive touchscreens show why people pick them for speed, looks, and strength. The higher price and glove problems make resistive panels better for some uses. Knowing these facts helps you choose the right Arduino touch panel.
Side-by-Side Comparison
Performance
Performance shows how well a touchscreen works in real life. Resistive panels need you to press down to work. You can use gloves or a stylus with them. But they might not react as fast. Capacitive panels sense touch with an electric field. They react quickly to light taps. You can use more than one finger at once. This makes capacitive screens better for fast and accurate jobs.
- Resistive touchscreens need you to push harder.
- Capacitive touchscreens work with gentle touches.
- Capacitive panels let you use multi-touch.
- Good performance is important in busy places.
Here is a table that shows the main differences:
| Feature | Resistive Touchscreen | Capacitive Touchscreen |
|---|---|---|
| Input Method | Pressure | Electric field |
| Responsiveness | Moderate | High |
| Multi-Touch | No | Yes |
User Experience
User experience is about how easy a screen is to use. People say capacitive screens feel smoother. You can tap or swipe with little effort. The screen reacts to light touches, which feels nice. Resistive panels need more pressure to work. This can make them less comfortable. People notice the difference when they try both.
- Capacitive screens are easy and fun to use.
- Multi-touch lets you zoom and scroll easily.
- Resistive screens need more effort to use.
- Fast and accurate screens make people happier.
Designers pick capacitive panels for projects that need a good user experience. Resistive panels are better if you need to use gloves or a stylus.
Cost
Cost is important when picking a touchscreen for Arduino projects. Resistive panels are cheaper. Many schools and small businesses use them for first projects. Capacitive screens cost more because they have better features. The price changes with material, how many you buy, and special designs.
- Resistive panels start at about $50 for normal sizes.
- Capacitive panels cost more because of new technology.
- Better materials make the price go up.
- Buying more panels can lower the price for each one.
- Custom designs make the total price higher.
Here is a simple table to compare cost:
| Touchscreen Type | Typical Cost Range |
|---|---|
| Resistive | $50 – $120 |
| Capacitive | $90 – $130 |
Tip: Think about the good and bad sides of both types before you choose. Cost, performance, and how easy it is to use all matter.
Environment
Touch panels have to work in many places. Things like heat, cold, water, and dust can change how they work. Each kind of touch panel deals with these things in its own way.
Resistive Touch Panels:
- Resistive panels work well almost anywhere. They handle dirt and water better than most capacitive panels.
- Workers use resistive screens in factories and outside. These screens are good in places with lots of dust.
- Humidity does not bother resistive panels much. They keep working when the air is wet or dry.
- You can touch the screen with gloves or any object. This helps in cold or dirty places.
- Hot or cold weather does not stop resistive panels. They keep working in all temperatures.
Capacitive Touch Panels:
- Capacitive panels sense touch with an electric field. This makes them more sensitive to their surroundings.
- High humidity can cause problems. The screen might think you touched it when you did not.
- Water drops or sweat can make the screen hard to use. The panel might not know where you really touched.
- Dust and dirt can also change how the screen works. The electric field can pick up signals from these things.
- Covers and cases help keep moisture and dust away. Many people use them to protect capacitive panels.
- Capacitive panels work best in clean and dry places. They show bright pictures and respond fast when the area is right.
Note: Using covers and cases helps both types of panels last longer. They keep out water, dust, and dirt.
Table: Environmental Suitability
| Condition | Resistive Panel | Capacitive Panel |
|---|---|---|
| High Humidity | Good | Needs protection |
| Dusty Areas | Good | Needs protection |
| Wet Conditions | Good | Needs protection |
| Extreme Temperatures | Good | Good |
| Glove Use | Good | Limited |
People should think about where they will use the touch panel. Factories, outdoor kiosks, and medical devices often need resistive panels. These places have more dust, water, or changing temperatures. Stores, offices, and homes usually use capacitive panels. These places are clean and dry most of the time.
Picking the right panel for the place helps the device last longer. It also helps it work better. SOUSHINE touch panels work well in many places. Users can choose the best type and protect it with a good cover.
Choosing a Touch Panel
Project Needs
Each project needs something different. Some need a simple screen. Others need more features. When picking a touchscreen, people should check a few things. The table below lists what to look for:
| Criteria | Description |
|---|---|
| Display Technology | TFT LCD with resistive touch is often used. |
| Screen Size and Resolution | Most use 3.5 to 4-inch screens with 480×320 resolution. |
| Communication Interface | SPI is easy to use. Parallel is faster. |
| Power Requirements | Low power and adjustable backlight help save battery. |
| Durability | Protective coatings help in tough places. |
| Additional Features | Multi-touch, gestures, and sensors add value but make things harder. |
People should pick a panel that fits their project. A menu might only need basic touch. A game or kiosk may need multi-touch and a bright screen. SOUSHINE has panels with many features. This helps people find the right one.
Budget
Budget is important when picking a panel. Some projects need to save money. Others can spend more for better features. The table below shows cost and features:
| Touchscreen Type | Cost-Effectiveness | Features |
|---|---|---|
| Resistive | Cheaper | Basic touch input |
| Capacitive | Costs more | Better sensitivity, multi-touch |
- People pick resistive panels to save money.
- Capacitive panels cost more but have better features.
SOUSHINE sells both types. Users can choose what fits their budget. Schools and small shops often use resistive panels first. Bigger projects may use capacitive panels for more features.
Environment
Where you use the panel matters a lot. Some places have dust, water, or get very hot or cold. Materials like ITO glass help with touch but can affect the environment when made. Power use is important, too, especially for things that run all day or use batteries. Backlights can use lots of energy.
People should think about where the panel will go. Outdoor projects need panels that work in sun and rain. Indoor projects may care more about how the screen looks. SOUSHINE panels work in many places, like homes and factories. They have options for different needs.
Tip: Always make sure the panel fits the place and power needs of your project.
Compatibility
Compatibility is very important when picking a touch panel for Arduino. Each Arduino board is different and has its own pins. Some touch panels work with many boards, but some only fit a few. Makers must check if the touch panel fits their Arduino board.
Many touch panels connect right to Arduino UNO R3 or Mega 2560. These boards have pins in the same places. Some panels plug in without extra wires. Other boards, like Arduino Nano or Leonardo, may need adapters or special wires. Checking the pins and how to connect helps stop problems later.
Shields and modules also change how things work together. Some touch panels are shields that stack on top of Arduino. Shields make it easy to set up. Modules might need jumper wires or a breadboard. Makers should read the product info before they buy.
The table below shows how a popular touch panel works with Arduino boards:
| Touch Panel Model | Compatible Arduino Models | Notes |
|---|---|---|
| 2.4″ TFT SD Reader Touch Screen Module | Arduino UNO R3, Mega 2560 | Plugs in directly; may not work with other boards |
Software libraries help the touch panel talk to Arduino. Each panel might need a different library. Some libraries work with many panels and boards. Others only work with one kind. Makers should check if the library works with their board and panel.
Power is also important for compatibility. Some panels need more power than Arduino gives. Bigger screens may need outside power. Makers should check voltage and current before hooking up the panel.
SOUSHINE touch panels work with many Arduino boards and shields. Makers can use them for simple or advanced projects. SOUSHINE gives clear guides and tested ways to set up, so it is easier.
Tip: Always look at the product manual and Arduino specs before you buy a touch panel. This helps you avoid wiring and software mistakes.
Picking the right touchscreen means checking hardware, software, and power. Makers who plan ahead save time and stop problems. Good compatibility makes sure the touch panel works well in your project.
SOUSHINE Touch Panels
Features
SOUSHINE touch panels use projected capacitive technology. This makes them fast and accurate. The panels can sense even a light touch. They also let you use more than one finger at once. The cover glass is strong and does not scratch easily. This helps the screen last a long time. SOUSHINE panels look modern with glass from edge to edge. The design fits many different devices. Each panel is set up and ready to use with Arduino boards.
Here is a table that shows how SOUSHINE touch panels compare to other Arduino-compatible panels:
| Feature | SOUSHINE Touch Panels | Other Arduino-Compatible Panels |
|---|---|---|
| User Experience | Flawless multi-touch, zero-latency, clear display | Varies |
| Durability | Chemically strengthened, scratch-resistant, high IP ratings | Less durable |
| Aesthetics | Sleek, modern, edge-to-edge glass | Bulkier designs |
| Integration | Customized, optically bonded, improved readability | Limited customization |
Advantages
SOUSHINE panels have many good points for Arduino projects. The capacitive technology makes them smooth and quick to use. You can tap, swipe, or use more than one finger. The screen shows bright pictures and clear words. The glass does not scratch, so it stays looking new. These panels work in homes, factories, and more. They connect easily to Arduino boards, which saves setup time. SOUSHINE makes sure each panel is ready to use right away.
Note: SOUSHINE panels are special because they are strong, look nice, and are easy to use.
Applications
SOUSHINE touch panels work in many real-life projects. People use them in smart home controls and tablets. In factories, they help run machines and show data. Stores use them in kiosks and checkout systems. Offices use them for meeting rooms and smart desks. They also work in building controls and car displays. The strong glass and capacitive technology make them good for inside and outside. SOUSHINE panels fit many uses and always give a good experience.
Tip: SOUSHINE touch panels help people make projects that need a strong, clear, and quick touchscreen.
Integration Tips
Setup
When you set up an Arduino touch panel, start by checking the wires. Make sure each touch panel pin matches the right Arduino pin. Most panels use SPI or I2C to talk to Arduino. Connect the wires from the panel to the correct pins. The display cable goes to the display pins. The touch cable connects to the touch pins.
Here is a table that shows common connections:
| Touch Panel Pin | Arduino Pin |
|---|---|
| VCC | 5V or 3.3V |
| GND | GND |
| SCL/SCK | SCL or SCK |
| SDA/MOSI | SDA or MOSI |
| CS | Digital Pin |
| IRQ | Digital Pin |
After you finish wiring, install the needed libraries. Most panels need a display library and a touch library. Download these using the Arduino IDE Library Manager. Open an example sketch and upload it to the board. The screen should turn on and react when you touch it.
Tip: Always read the panel’s datasheet before wiring. This helps you avoid mistakes.
Troubleshooting
Sometimes the touch panel does not work right. First, check if the panel has enough power. If the screen is dark, look at the wires. Loose or wrong wires can cause problems.
Test the touch by running a simple sketch. If it does not respond, check the library version. Old libraries may not work with new panels. Update the library and try again.
Here are some common problems and fixes:
- Screen does not turn on: Check power and wires.
- Touch does not work: Check library and pin setup.
- Display flickers: Check power and cable quality.
- Random touches: Clean the screen and check for interference.
Note: Shielded cables help stop noise and errors.
Optimization
Making the touch panel work better helps users. Change the touch sensitivity in the code. Lower sensitivity helps in noisy places. Higher sensitivity makes the panel react faster.
Set the display brightness for where you use it. Bright screens are good outside. Lower brightness saves power inside. Calibrate the touch panel with the calibration sketch. This makes sure touches are accurate.
Here is a checklist for better performance:
- Change touch sensitivity in software.
- Set display brightness for your location.
- Calibrate touch points for accuracy.
- Use short cables to stop signal loss.
- Update firmware for best results.
Tip: Calibrate the touch panel often to keep it working well.
Resistive and capacitive Arduino touch panels are both useful. Resistive panels are good if you wear gloves or work in hard places. Capacitive panels react fast and let you use more than one finger. You should think about your project, where you use it, and how much money you have before picking one.
- Resistive: saves money, works with gloves
- Capacitive: quick, lets you use gestures
SOUSHINE makes advanced touch panels for many jobs. Their panels help projects do well at home, in stores, and in factories.
FAQ
What is the main difference between resistive and capacitive touch panels?
Resistive panels work when you press them with anything. Capacitive panels sense changes from your finger’s electricity. You can use more than one finger on capacitive panels. Resistive panels let you use gloves or a stylus.
Can SOUSHINE touch panels connect to any Arduino board?
SOUSHINE touch panels fit many Arduino boards. You should check if the pins and power match before you connect. Most panels talk to Arduino using SPI or I2C.
Do capacitive touch panels work with gloves?
Normal capacitive panels do not work with regular gloves. Special gloves made for touchscreens will work. Resistive panels work with any glove or a stylus.
Which touch panel is better for outdoor projects?
Resistive panels are good with dirt, water, and hot or cold weather. Capacitive panels need extra protection from water and dust. SOUSHINE has strong panels for both types.
How do you clean a touch panel safely?
Use a soft cloth that does not leave lint. Do not use strong cleaners. For SOUSHINE panels, gently wipe the glass. Never put water right on the screen.
Can users perform multi-touch gestures on resistive panels?
Resistive panels only notice one touch at a time. You cannot do moves like pinch or zoom. Capacitive panels let you use more than one finger for gestures.
What makes SOUSHINE touch panels stand out?
SOUSHINE panels use advanced PCAP technology. They are very sensitive, have strong glass, and are easy to set up. These panels work for many jobs and projects.
Are SOUSHINE touch panels ready to use out of the box?
Yes. SOUSHINE panels are tested and ready to use. You can connect them to Arduino boards with just a little setup.