Call us: +86-137-2353-4866
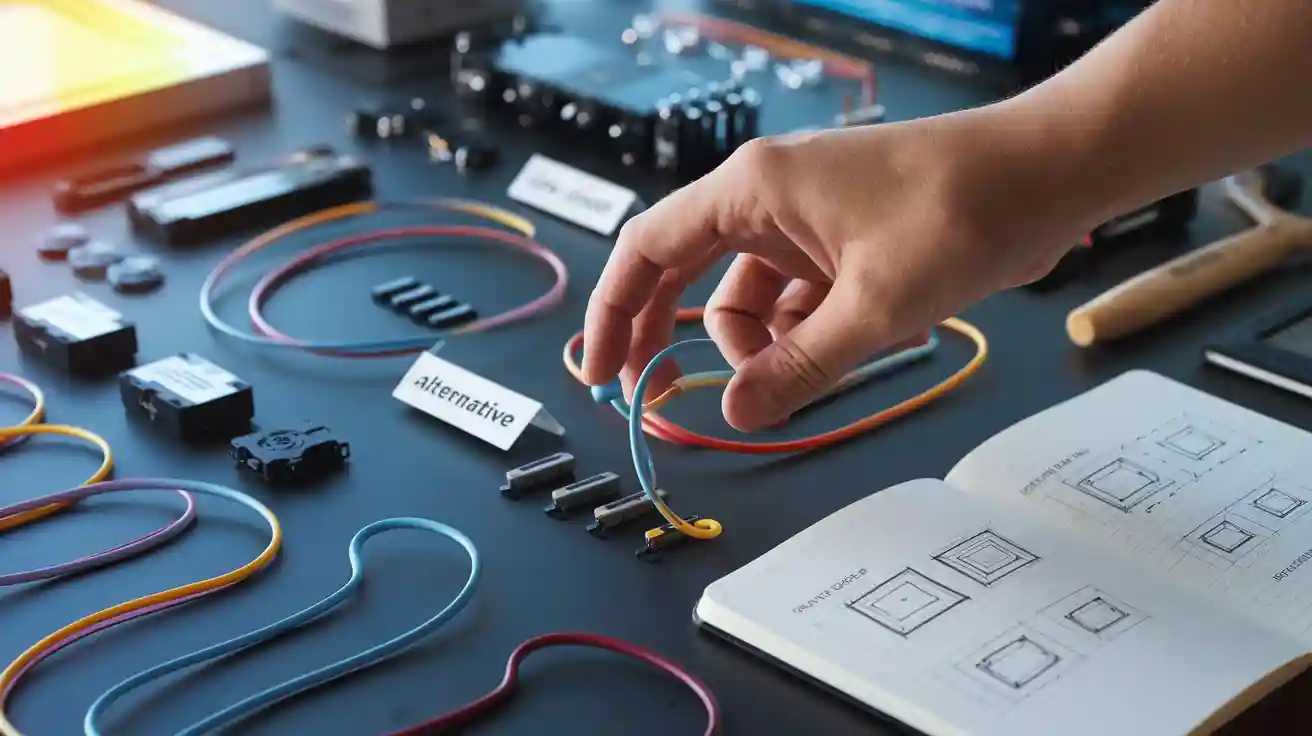
Many people who like diy projects pick cheap sensor options for their builds. SOUSHINE Force Sensing Resistors, potentiometer flex sensors, LDR optical sensors, Velostat film, anti-static bag sensors, optical fiber sensors, and fishing wire with foam board are good choices. These sensors work well and are easy for beginners to use. You can find them in many stores. The table below shows some short flex sensor designs cost less than $0.21. This makes them great for saving money.
| Component | Cost |
|---|---|
| LED (white) | <0.10$ |
| 470 ohm resistor | <0.01$ |
| 10 Kohm resistor | <0.02$ |
| photoresistor | <0.04$ |
| copper wire (30cm) | <0.01$ |
| insulating tape (20cm) | <0.01$ |
| plastic straw | <0.02$ |
| Total | <0.21$ |
Table of Contents
Key Takeaways
- SOUSHINE Force Sensing Resistors work well for DIY projects. They help measure force in a reliable way. Many people trust them for accurate results.
- Potentiometer flex sensors do not cost much. They fit into small spaces easily. These sensors are good for tiny designs.
- LDR optical flex sensors are cheap and simple to put together. Beginners find them easy to use. They are great for learning.
- Velostat film sensors bend easily and do not cost a lot. You can use them for simple bend detection. They work in many different projects.
- Anti-static bag sensors are easy to make at home. They use recycled materials, so they help the environment. These sensors support eco-friendly DIY ideas.
- Optical fiber sensors are very sensitive and do not get affected by electrical noise. They are great for jobs that need exact results. People use them for precise tasks.
- Fishing wire and foam board sensors are very cheap and simple to build. They are good for basic projects. Anyone can put them together.
- Pick the sensor that fits your project best. Think about what you need, how much money you have, and how accurate you want it to be.
Cheap and Accurate Alternative Sensors
SOUSHINE Force Sensing Resistors
Features
SOUSHINE Force Sensing Resistors help measure force and pressure. They use a special material that changes resistance when you press it. The sensor has a circuit and a spacer to keep it working well. You can use SOUSHINE FSRs in robots, smart gadgets, and flex sensor gloves. The company has made sensors for almost 20 years. They have important certifications like ISO9001:2015, RoHS, UL, CE, and ZHB. People trust these sensors for diy projects because they give steady results.
Tip: SOUSHINE FSRs change resistance smoothly, so they work great for projects that need exact force measurement.
Pros and Cons
| Pros | Cons |
|---|---|
| Flexible and easy to use | |
| Suitable for many applications | |
| Reliable and durable | |
| Supported by strong technical expertise | |
| Quality certifications |
Potentiometer Flex Sensors
How They Work
Potentiometer flex sensors find bending by using moving parts. When you bend the sensor, its resistance goes up or down. Designers pick sealed potentiometers for small builds. Mini and micro models fit into tight spaces. These sensors are good for short flex sensor designs. Potentiometers cost less than Hall Effect sensors. This helps save money on diy projects.
| Feature | Hall Effect Sensor | Sealed Potentiometer (Mini/Micro) |
|---|---|---|
| Cost | Higher | Lower |
Sealed potentiometers are great for devices that need to be small and cheap. Many hobbyists like them because they are flexible and not expensive.
Pros and Cons
| Pros | Cons |
|---|---|
| Low cost | |
| Easy to find | |
| Simple to use | |
| Fits compact designs |
LDR Optical Flex Sensors
Construction
LDR optical flex sensors use a light-dependent resistor and an LED. When you bend the sensor, less light hits the LDR. This makes the resistance change, and you can measure it. Builders use things like plastic straws, copper wire, and tape to make these sensors. You can build a basic LDR optical flex sensor for less than $0.21. This makes it a cheap and accurate choice for diy projects.
| Component | Cost Estimate |
|---|---|
| LED (white) | <0.10$ |
| 470 ohm resistor | <0.01$ |
| 10 Kohm resistor | <0.02$ |
| photoresistor | <0.04$ |
| copper wire (30cm) | <0.01$ |
| insulating tape (20cm) | <0.01$ |
| plastic straw | <0.02$ |
| Total | <0.21$ |
Pros and Cons
| Pros | Cons |
|---|---|
| Very low cost | |
| Easy to assemble | |
| Good for simple bend detection | |
| Uses common materials |
Velostat Film Sensors
Application
Velostat film sensors use a thin sheet made from conductive plastic. Builders put Velostat between two layers of copper tape or wire. When you bend or press the sensor, the resistance changes. This lets the sensor notice force or movement. Many hobbyists use Velostat in flex sensor gloves. It is easy to cut and shape. Velostat is picked for short flex sensor designs because it costs less than other choices.
- Velostat film sensors are cheap and work well for basic bend detection.
- The cost for a Velostat sensor is low, so many people use it for DIY builds.
- Velostat is not as accurate as Force Sensing Resistors. FSRs have force repeatability of 2% to 5% for one part and 15% to 25% between parts.
Note: Velostat is good for simple projects but may not give exact measurements for advanced builds.
Pros and Cons
| Pros | Cons |
|---|---|
| Low cost | Not as accurate as FSRs |
| Easy to cut and shape | Sensitivity changes between sensors |
| Flexible and lightweight | Not best for high-precision projects |
| Uses common conductive materials |
Anti-Static Bag Bend Sensors
DIY Steps
Anti-static bag bend sensors use special bags like Vermason Conductive Bags. Makers cut a piece about 10×15 cm from the bag. They use a pencil, pen knife, and wire stripper to get the sensor ready. Two strips of conductive material go on each side of the bag. When the sensor bends, resistance changes. This helps detect movement.
- You need anti-static bags, a pencil, pen knife, and wire stripper.
- The sensor works by changing resistance when bent.
- Many people use these sensors in flex sensor gloves, like sign language translation gloves.
Tip: Anti-static bag bend sensors last a long time and are good for DIY projects.
Pros and Cons
| Pros | Cons |
|---|---|
| Very low material cost | Not as sensitive as commercial sensors |
| Easy to put together | Durability depends on bag quality |
| Uses conductive materials | May need frequent calibration |
| Reliable for basic bend detection |
Optical Fiber Sensors
Principle
Optical fiber sensors use thin strands of plastic or glass. They detect changes in light passing through. When the fiber bends, less light gets through. The sensor measures this change to notice movement or force. Plastic optical fibers (POF) are more flexible and cost less than glass ones. These sensors are very sensitive and can spot small bends. They do not get affected by electromagnetic interference, so they work well in noisy places.
| Attribute | Optical Fiber Sensors | Other Flex Sensors Alternatives |
|---|---|---|
| Flexibility | High (especially POF) | Often less flexible |
| Accuracy | High sensitivity, can spot small changes | Lower sensitivity |
| Price | Cost-effective, especially POF | Usually higher costs |
- Optical fiber sensors are accurate and flexible.
- They are cheap and work well for projects that need precise bend detection.
- Builders use these sensors in robots, wearables, and gaming devices.
Tip: Optical fiber sensors are great in places with electrical noise because they use light, not electricity.
Pros and Cons
| Pros | Cons |
|---|---|
| High sensitivity | May need special connectors |
| Flexible and lightweight | Putting them together can be hard |
| Immune to electromagnetic interference | |
| Cost-effective, especially with POF |
Fishing Wire and Foam Board Sensors
DIY Steps
A lot of hobbyists use fishing wire and foam board. They make a simple bend sensor with these items. This sensor is good for short flex sensor designs. The materials are cheap and easy to get.
Materials Needed:
- Fishing wire (about 30 cm)
- Foam board (small piece, around 10×15 cm)
- Two strips of conductive tape or copper wire
- Insulating tape
- Scissors
Assembly Steps:
- Cut the foam board into a rectangle shape.
- Put one strip of conductive tape on each side.
- Place the fishing wire between the two strips. Make sure it goes along the board.
- Wrap insulating tape around everything to keep it together.
- Attach copper wires to the tape so you can measure.
When you bend the foam board, the fishing wire pushes on the tape. This makes the resistance change. You can check this change with a simple circuit.
Tip: Pick strong fishing wire so your sensor lasts longer. Try out the sensor before using it in your project.
Pros and Cons
| Pros | Cons |
|---|---|
| Very low material cost | Not as accurate as commercial sensors |
| Easy to assemble | May wear out with heavy use |
| Uses common conductive materials | Limited sensitivity |
| Good for basic bend detection | Not suitable for advanced projects |
Fishing wire and foam board sensors help makers save money. They are good for basic flex detection in DIY builds. The conductive tape lets you measure changes fast. Many people pick this sensor for simple projects.
Short Flex Sensor Alternatives

Compact SOUSHINE FSRs
Compact SOUSHINE Force Sensing Resistors are good for small spaces. These sensors come in many shapes and sizes. Some are tiny dots, and some are bigger sheets. Makers can pick the size that fits their project. The material is flexible, so it bends and stretches without breaking. This makes it great for wearables and robot gloves. One sensor costs between $10 and $50. This is cheaper than many other sensors. SOUSHINE FSRs have a special layer that changes resistance when you press it. This helps the sensor notice force in a steady way.
Tip: Compact SOUSHINE FSRs fit in tight spots and give steady results for lots of DIY projects.
| Sensor Type | Size Characteristics | Flexibility | Cost Range (USD per unit, 2025) |
|---|---|---|---|
| FSRs | Customizable, from tiny dots to sheets | Flexible, bendable | 10 – 50 |
Mini Potentiometer Sensors
Mini potentiometer sensors are a cheap choice for short flex sensor designs. These sensors have a shaft smaller than 10mm or a body thinner than 5mm. Their small size helps them fit in tiny devices. Many hobbyists use sealed mini potentiometers because they last longer and cost less. The sensor finds bending by changing resistance as the shaft moves. This gives a simple way to measure movement.
- Mini potentiometer sensors are easy to buy at electronics stores.
- They work well in small projects with little space.
- The price is lower than most other sensors, especially sealed ones.
| Sensor Type | Size | Accuracy | Cost | Ease of Integration | Typical Use Case |
|---|---|---|---|---|---|
| Mini Potentiometer | Under 10mm | Moderate | $ | Easy | Wearables, small robots |
Small Velostat Strips
Small Velostat strips use a thin plastic film that conducts electricity. Makers cut the film into skinny strips for short flex sensor projects. The strips go between two layers of tape or wire that conduct electricity. When you bend the strip, the resistance changes. This helps the sensor notice movement or force. Velostat strips cost less than most other sensors. Many people use them in gloves or wearables because they are flexible and easy to shape.
- Small Velostat strips are light and easy to put together.
- The film reacts to bending and pressure.
- These strips are best for simple movement detection.
Note: Small Velostat strips are a cheap way to add flex sensing to DIY projects.
Thin Optical Fiber Sensors
Thin optical fiber sensors give makers a way to measure bending in small spaces. These sensors use plastic optical fibers. The fibers carry light from one end to the other. When the fiber bends, less light reaches the end. The sensor detects this change and shows how much the fiber bends.
People use thin optical fiber sensors in many DIY projects. The fibers fit inside gloves, toys, and robot arms. Makers choose plastic fibers because they cost less than glass fibers. Plastic fibers bend easily and do not break. The sensor works well in places with electrical noise because it uses light, not electricity.
Builders often use a small LED and a light detector with the fiber. The LED sends light through the fiber. The light detector measures how much light comes out. If the fiber bends, the light drops. The sensor shows this change. Makers can use a simple circuit to read the signal.
Thin optical fiber sensors do not need much space. The fiber can be as thin as a piece of thread. Makers can cut the fiber to any length. The sensor fits inside small devices. The fiber does not add much weight. This helps in wearables and small robots.
People like these sensors because they do not need special tools. The fiber is easy to handle. Makers use glue or tape to hold the fiber in place. The sensor does not need soldering. The fiber does not react to magnets or wires. This makes the sensor stable in many places.
Thin optical fiber sensors work with many materials. Makers often use plastic straws or foam to hold the fiber. Some builders add a layer of conductive tape to connect the sensor to a circuit. The tape helps send the signal to a microcontroller. The sensor gives a fast response when the fiber bends.
Tip: Makers can test the sensor by bending the fiber and watching the light change. They can use a simple voltmeter to see the signal.
The cost for thin optical fiber sensors stays low. Plastic fibers cost less than $1 for a meter. LEDs and light detectors cost less than $0.20 each. Makers can build a sensor for less than $2. The sensor lasts a long time if handled with care.
| Feature | Thin Optical Fiber Sensor | Other Short Flex Sensors |
|---|---|---|
| Size | Very thin | Thin to medium |
| Flexibility | High | Medium to high |
| Cost | Low | Low to medium |
| Assembly | Simple | Simple |
| Sensitivity | High | Medium |
Thin optical fiber sensors help makers build small, light, and sensitive devices. The sensor works well in many DIY projects. Makers can use it in gloves, toys, and robots. The fiber bends easily and gives a clear signal.
DIY Bend Sensor Options

Velostat DIY Bend Sensor
Parts List
To build a diy bend sensor with Velostat, gather the parts below:
- Velostat bag (cut to 97mm x 12mm)
- Adhesive copper tape (conductive adhesive)
- PVC paper (two strips, 100mm x 15mm)
- Insulation tape
- Spray mount or craft glue
- Multimeter
- 1k resistor
- Scissors
- Ruler
The total budget for these parts stays low. Most items come from local stores or online shops.
Assembly
Follow these steps to assemble the Velostat diy bend sensor:
- Cut the Velostat strip to 97mm by 12mm.
- Cut two PVC paper strips to 100mm by 15mm.
- Stick one copper tape strip onto the Velostat using the adhesive side.
- Glue the Velostat strip onto one PVC strip with the copper side down. Keep glue away from the exposed Velostat side.
- Fold the overhanging copper tape to create a tab for connections.
- Stick the second copper tape strip onto the other PVC strip, making another tab.
- Use insulation tape to create a shallow lip around the edge of the PVC strip.
- Bind the sensor together with insulation tape or craft glue. Do not let glue touch the copper or Velostat strip.
Tip: Make sure the copper tape tabs stay exposed for easy connection to wires.
Testing
Testing the diy bend sensor helps check its performance:
- Connect the tabs to a multimeter and a 1k resistor.
- Bend the sensor gently and watch the resistance change.
- Straighten the sensor and see if the value returns to the starting point.
Common issues include delayed response times and inconsistent return to original values. Handmade sensors may show variable pressure sensitivity. Conductive fabric might not keep constant contact with Velostat. The Velostat material can cause slow return in sensor value due to its elasticity.
Anti-Static Bag DIY Bend Sensor
Parts List
To build an anti-static bag diy bend sensor, gather the parts below:
- Velostat plastic bag
- Masking tape
- Jumper wires
For another version, use these parts:
- Two flexible plastic strips (2cm x 10cm)
- Two aluminum foil strips (1cm x 9cm)
- One bond paper strip (2cm x 10cm)
- One sharpened pencil
- One 10K-ohm resistor
- Four jumper wires
These parts fit most budgets and work for simple diy projects.
Assembly
Follow these steps for the basic anti-static bag diy bend sensor:
- Sandwich the Velostat between layers of masking tape.
- Attach jumper wires to the Velostat.
- Laminate the pieces together to create a flexible potentiometer.
For the second version:
- Darken the bond paper with a pencil.
- Stick aluminum foil strips to the plastic strips.
- Sandwich the darkened paper between the aluminum foils.
- Use tape to hold everything together.
Note: Use strong tape to keep the sensor flat and flexible.
Testing
To test the anti-static bag diy bend sensor:
- Connect jumper wires to a multimeter.
- Bend the sensor and watch the resistance change.
- Straighten the sensor and check if the value returns to the starting point.
Users report reliable basic bend detection. The sensor may need frequent calibration for best results.
Fishing Wire DIY Bend Sensor
Parts List
The table below lists the parts needed for a fishing wire diy bend sensor:
| Material/Tool | Quantity |
|---|---|
| Cardboard Strips (10cm x 1.5cm) | 2 |
| Paper Strip (10cm x 1.5cm) | 1 |
| Tinfoil/Aluminum Foil Strips | 2 (9cm x 1cm each) |
| Glue | Some |
| Pencil | 1 |
| Jumper Wire | 2 small pieces |
| Hot Glue Gun (Optional) | 1 |
Most makers find these parts easy to source and affordable for any diy project.
Assembly
To build the fishing wire diy bend sensor:
- Cut two cardboard strips and one paper strip to size.
- Darken the paper strip with a pencil.
- Stick tinfoil strips to the cardboard strips.
- Sandwich the paper strip between the tinfoil-covered cardboard strips.
- Glue the layers together. Use a hot glue gun for stronger bonds if needed.
- Attach jumper wires to the tinfoil for connections.
Tip: Use strong glue to keep the sensor from falling apart during use.
Testing
Testing the fishing wire diy bend sensor involves these steps:
- Connect the jumper wires to a multimeter.
- Bend the sensor and observe the resistance change.
- Straighten the sensor and check if the value returns.
Users report temperature problems with dyneema wire, which can cause inaccuracies. Some suggest using steel cables or stronger springs for better results. Strain gauges may improve sensing accuracy.
Comparing Alternatives
Performance
Every sensor works differently in DIY projects. SOUSHINE Force Sensing Resistors give steady results. They measure force changes well in many uses. Potentiometer flex sensors react fast to movement. Their resistance changes clearly when bent. LDR optical flex sensors find simple bends. They work best for projects that do not need high accuracy. Velostat film sensors sense pressure and movement. They are good for basic bend detection but are less precise than FSRs. Anti-static bag sensors give reliable signals for easy tasks. Optical fiber sensors are very sensitive. They spot small bends and ignore electrical noise. Fishing wire and foam board sensors detect basic movement. They do not give detailed data but help with simple builds.
Tip: Pick a sensor that matches how accurate your project needs to be.
Durability
Durability is important for projects used a lot. SOUSHINE FSRs last through many uses. They resist wear and keep working for a long time. Potentiometer flex sensors have moving parts that can wear out. Heavy use makes these parts break faster. LDR optical sensors use simple parts that last if handled gently. Velostat film sensors stay flexible and do not break easily. Anti-static bag sensors last longer if the bag is good quality. Optical fiber sensors have no moving parts. They last long if you do not bend them too much. Fishing wire and foam board sensors may break or lose shape quickly. The materials can wear out after many bends.
Note: If your project bends a lot, choose sensors that last longer.
Ease of Assembly
Easy assembly helps beginners finish projects faster. SOUSHINE FSRs connect easily to microcontrollers. Potentiometer flex sensors need simple wiring and fit in small spaces. LDR optical sensors use common parts like LEDs and resistors. Builders can put them together with basic tools. Velostat film sensors need cutting and taping but no special skills. Anti-static bag sensors use simple materials and easy steps. Optical fiber sensors need careful handling but no soldering. Fishing wire and foam board sensors use everyday items. Makers can build them with scissors, tape, and glue.
| Sensor Type | Performance | Durability | Ease of Assembly |
|---|---|---|---|
| SOUSHINE FSRs | High | High | Easy |
| Potentiometer Flex Sensors | Moderate | Moderate | Easy |
| LDR Optical Sensors | Basic | Moderate | Easy |
| Velostat Film Sensors | Basic | High | Easy |
| Anti-Static Bag Sensors | Basic | Moderate | Easy |
| Optical Fiber Sensors | High | High | Moderate |
| Fishing Wire/Foam Board | Basic | Low | Easy |
Makers should pick a sensor that fits their skill and project needs.
Cost
Cost plays a big role in choosing a flex sensor for a DIY project. Makers often look for sensors that fit their budget and work well. Each sensor type has a different price range. Some sensors cost less than a dollar, while others cost much more.
The table below shows the typical cost for each sensor alternative:
| Sensor Type | Estimated Cost (USD) | Notes |
|---|---|---|
| SOUSHINE FSRs | $10 – $50 | High quality, reliable output |
| Potentiometer Flex Sensors | $1 – $5 | Good for simple projects |
| LDR Optical Flex Sensors | <$0.21 | Uses common parts |
| Velostat Film Sensors | <$2 | Sold by the sheet |
| Anti-Static Bag Sensors | <$1 | Uses recycled materials |
| Optical Fiber Sensors | <$2 | Needs LED and detector |
| Fishing Wire/Foam Board | <$1 | Very low material cost |
SOUSHINE FSRs cost more than other options. They offer strong performance and last longer. Potentiometer flex sensors give a good balance between price and function. LDR optical flex sensors use cheap parts like LEDs and resistors. Velostat film sensors come in sheets and cost less for each sensor. Anti-static bag sensors use recycled bags, so the price stays low. Optical fiber sensors need extra parts, but the total cost stays under two dollars. Fishing wire and foam board sensors use simple materials found at home.
Makers should think about the total cost, not just the price of the sensor. Some sensors need extra parts or tools. Others work with a simple interface and connect to a microcontroller with basic wires. The cost of assembly and testing also matters. For beginners, sensors that use common materials help keep costs down.
Tip: Makers can save money by buying parts in bulk or using recycled materials. They should check local stores and online shops for deals.
Choosing the right sensor depends on the project budget and needs. Makers who want high accuracy may spend more. Those who need basic bend detection can pick cheaper options. Cost affects the final design and how many sensors a maker can use.
DIY Applications
Wearables
Lots of makers use cheap flex sensors in wearables. These sensors help track finger movement and hand shape. Motion capture gloves are a popular project. Makers put sensors on each finger. The sensors notice when fingers bend. They send signals to a microcontroller. This setup helps follow finger positions for sign language or virtual reality.
| Aspect | Details |
|---|---|
| Common Projects | Gloves that measure finger movement |
| Advantages | Cheap, simple to use, no hard coding needed |
| Limitations | Not always accurate, can stretch over time, short length, can’t measure big bends |
| Performance Outcome | Good for small bends, not great for big angles or exact measurements |
Wearable gadgets use these sensors because they are light and bend easily. Makers can make gloves, sleeves, or bands that fit well. The sensors work for small bends. They do not measure big angles or exact spots. Users say they work well for easy finger tracking.
Tip: Try different sensor spots to get the best finger movement results.
Robotics
Robotics projects use cheap flex sensors to check movement and force. Makers build robot hands that use these sensors to see finger bends. The sensors change resistance when bent. The microcontroller reads this and moves the robot fingers.
- Flexible sensors are light and fit many robot designs.
- Makers use them for health checks and smart robots.
- The sensors help robots feel pressure for safety.
- Robot hands use flex sensors to notice hand moves.
- Putting sensors in robots can be tricky and may not always work right.
- Store-bought sensors limit design, so makers pick cheaper ones.
Robots need sensors that are easy to shape and stick on. Makers pick flexible sensors because they do not weigh much. The sensors help robots react to touch and pressure. Some projects use these sensors for robots that work with people.
Note: Makers should test how sensors react and set them up before using them in robots.
Gaming
Gaming projects use flex sensors to make cool controls. Makers build gloves or controllers that sense finger bends. The sensors send signals to the game system. Players move fingers to control the game. This lets people play without pressing buttons.
Makers use sensors in virtual reality gloves. The sensors track finger moves and send data to the computer. The game reacts to every bend and gesture. This makes games feel more real. Makers also use sensors in racing games to check steering wheel pressure.
Flex sensors help makers create custom gaming gear. The sensors are cheap and simple to connect. Makers can change the design to fit what they want. The sensors work best for easy moves and basic controls.
Tip: Makers should test how sensors work in games to make them more accurate and fun.
Music
Low-cost flex sensor alternatives help people make new music tools. Many students and hobbyists use these sensors for fun projects. These sensors let you play music by touching, pressing, or bending them. You can make music in cool and different ways.
Musicians want cheap tools to try new sounds. Flex sensors can turn simple things into music controllers. For example, a piece of cardboard can be a drum pad or keyboard. Builders connect sensors to microcontrollers. The microcontroller sends signals to a computer or phone. The device makes sounds when you touch or bend the sensor.
Makers use flex sensors to build instruments that work for them. They can change how big, small, or sensitive each sensor is. This helps students learn about music and technology together.
Many projects show how flex sensors work in music:
- Some researchers make cheap touch sensors for music tools. These sensors let you control volume, pitch, or effects by pressing or bending.
- The Sibilim is a music tool made from a cardboard box and buttons. You can move the buttons around fast. The device connects to a phone and works well in classes.
- Some makers build their own sensors for music. They use Velostat, anti-static bags, or fishing wire. These homemade sensors cost less and give more ways to design.
The table below shows how people use flex sensor alternatives in music:
| Application | Sensor Type | Example Materials | Output Device |
|---|---|---|---|
| Drum pads | Velostat, foam board | Copper tape, cardboard | Computer, speaker |
| Touch keyboards | LDR, FSR | LED, photoresistor | Smartphone, tablet |
| Pressure controls | Anti-static bag | Conductive bag, wire | Synthesizer |
| Gesture controllers | Optical fiber | Plastic fiber, tape | MIDI controller |
Students and teachers use these sensors to teach music and electronics. Workshops have activities where people build simple instruments. They learn how sensors work and how to connect them to speakers.
Tip: Makers can try different sensor materials to get the best sound. They should also change the shape and spot of sensors to make playing easier.
Flex sensor alternatives make music tech easier for everyone. They help lower the price of making instruments and let people be creative. Many users share their ideas online to help others start projects. These sensors help people learn and invent new things in music.
SOUSHINE FSRs, potentiometer flex sensors, Velostat, and optical fiber sensors each offer unique strengths for DIY projects. SOUSHINE FSRs stand out for reliable results and easy use. Makers looking for the best balance of cost and accuracy can start with Velostat or LDR optical sensors. Beginners can follow these steps to build a simple bend sensor:
- Gather tinfoil, cardboard, and wires.
- Glue tinfoil strips onto cardboard.
- Shade a paper strip with a pencil.
- Attach wires to the tinfoil.
- Stack and secure all parts.
- Test the sensor with an Arduino and LED.
- Troubleshoot if needed.
Makers can try different materials and designs to find what works best for their projects.
FAQ
What is the cheapest flex sensor alternative for beginners?
LDR optical flex sensors cost less than $0.21. Makers use easy-to-find parts like LEDs and resistors. This sensor is good for finding simple bends. Many beginners pick this sensor to start.
Can SOUSHINE FSRs connect to Arduino boards?
SOUSHINE FSRs work with Arduino boards. Makers use simple wires to hook up the sensor. The sensor changes resistance when pressed. Arduino reads this and shows how much force is used.
How accurate are Velostat film sensors?
Velostat film sensors find basic bends and pressure. They are not as exact as SOUSHINE FSRs. Makers use Velostat for easy projects that do not need perfect accuracy.
Do optical fiber sensors need special tools?
Optical fiber sensors use plastic fibers, LEDs, and light detectors. Makers do not need special tools to build them. They use glue or tape to hold the fiber in place. The sensor works with simple circuits.
Which sensor lasts the longest in DIY projects?
SOUSHINE FSRs last longer than most other sensors. The sensor does not wear out fast and works after many bends. Makers choose this sensor when they want something strong.
Can flex sensors measure finger movement in gloves?
Flex sensors can measure finger movement in gloves. Makers use SOUSHINE FSRs, Velostat, or optical fiber sensors for this. The sensor sends signals to a microcontroller. The glove can track when fingers bend.
Are anti-static bag sensors safe to use?
Anti-static bag sensors use bags from electronics packaging. Makers cut and put together the sensor with simple tools. The sensor is safe to use for normal projects.