Call us: +86-137-2353-4866
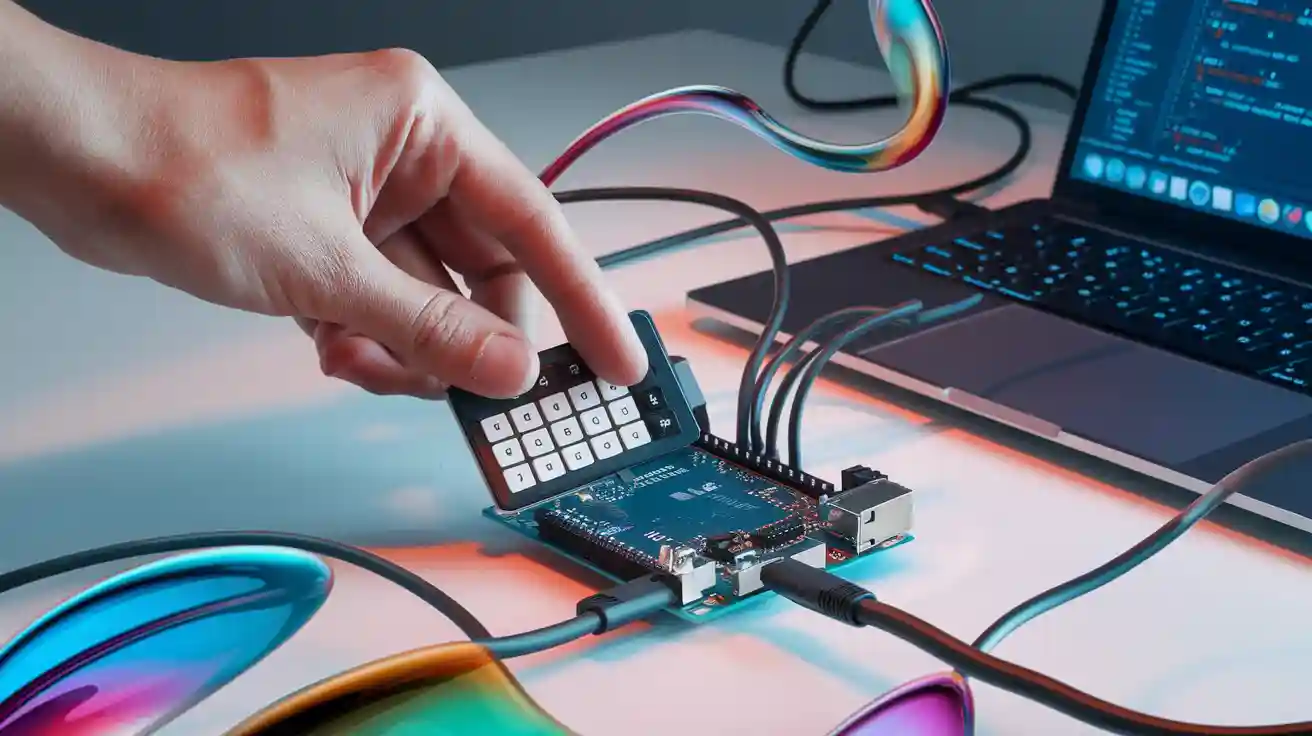
Setting up a membrane keypad 1×4 with Arduino is easy. People who like electronics see their projects work fast. You only need a few wires and some code. Many use the SOUSHINE membrane switch. It works well and looks smart. Here are some new things in membrane keypad technology for 2025:
| Feature | Description |
|---|---|
| Durability | Made to last a long time. Great for projects you use a lot. |
| Sealed Design | Keeps out dust, water, and chemicals. This helps it work well anywhere. |
| Ease of Cleaning | The smooth surface is simple to clean. This helps it last longer. |
People who want a quick setup like the membrane keypad 1×4. It helps them try new ideas.
Table of Contents
Key Takeaways
- Setting up a 1×4 membrane keypad with Arduino is easy. You do not need many parts. The SOUSHINE membrane switch is strong and lasts a long time. It is sealed and simple to clean. This makes it good for many projects. Use jumper wires to connect the keypad to the Arduino. Make sure the wires are tight for good performance. Install the keypad library in the Arduino IDE. This helps you handle button presses and stops extra signals. Test your setup by looking at the serial monitor. Check if the right button shows up when you press it. Sometimes, problems happen like loose wires or double readings. Fix these by checking the wires and using INPUT_PULLUP. Try project ideas like security systems or easy games. These can make your Arduino projects more fun. Join online groups for help and tutorials. You can learn more and share your projects there.
Components for Arduino Membrane Keypad
SOUSHINE Membrane Switch
Features
SOUSHINE’s membrane switch is special in projects. The switch has layers of thin plastic and glue. The top layer shows a picture. This layer keeps out water, dust, and chemicals. People clean it by wiping the surface. The switch works well where things must stay clean. When you press a button, you feel a click. Some switches have lights for dark places. EMI and RFI shielding help signals stay clear. Designers choose colors and shapes they like. The switch matches many different styles.
Tip: SOUSHINE membrane switches last for thousands of presses. They keep working even if you use them a lot.
Applications
People use SOUSHINE membrane switches in many places. Hospitals use them for medical machines. Factories use them for controls. Gamers use them in electronics. Car makers use them for dashboards. The switch works anywhere you need a button. Students use them in school projects. Hobbyists put them in homemade gadgets. The switch can handle many jobs.
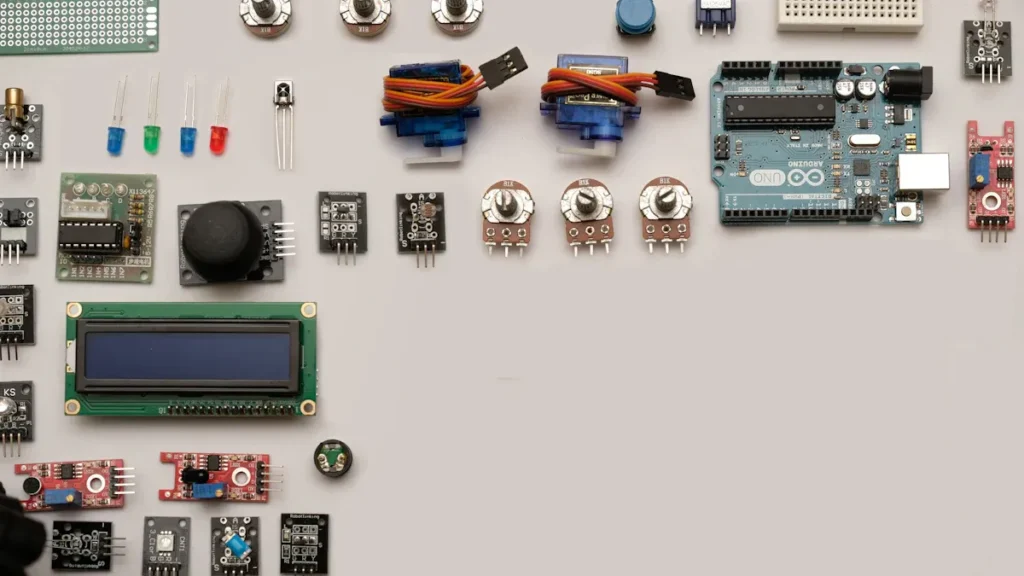
Required Parts
Arduino Board
The Arduino board is the main part of every project. Most people use the Arduino UNO R4. This board connects to computers easily. It runs code to read button presses. Some people use a USB Type-A to Type-C cable. Others use a USB Type-C to Type-C cable. The board goes inside a box to stay safe.
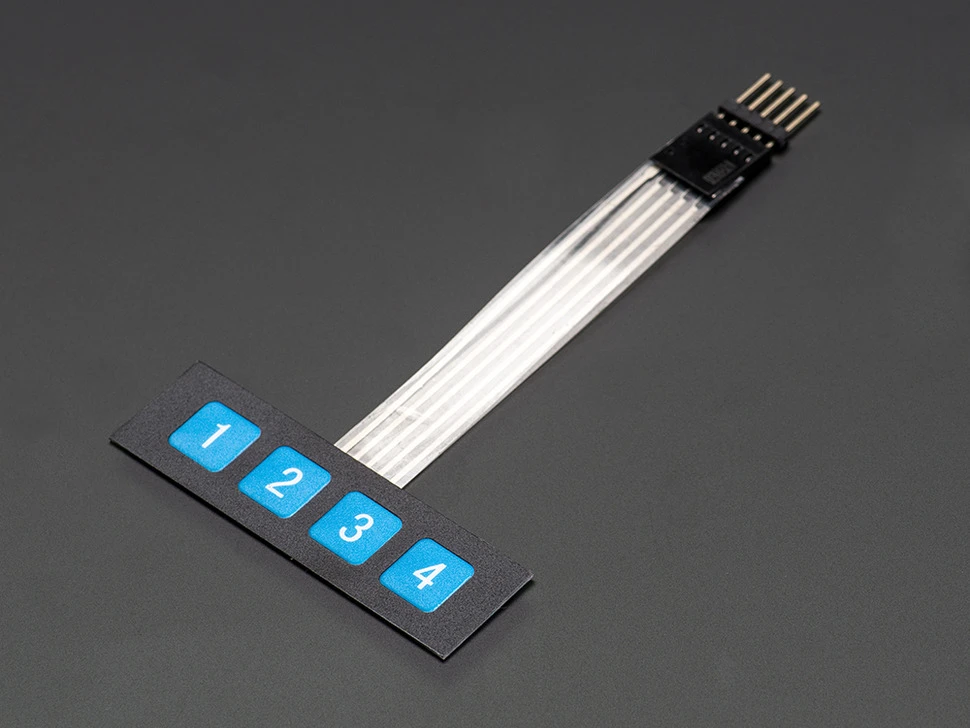
Membrane Keypad 1×4
The membrane keypad 1×4 has four buttons in a line. Each button sends a signal to the Arduino. The keypad connects with simple wires. Builders pick this keypad for fast setups. It fits on a desk or inside a box.
Jumper Wires
Jumper wires connect the keypad to the Arduino. They come in many colors. Builders use them to make neat setups. Some add a screw terminal block shield for safety. Others use a breadboard shield for easy changes. A base plate and breadboard kit keep things steady.
- Arduino UNO R4
- USB Cable Type-A to Type-C
- USB Cable Type-C to Type-C
- Keypad 1×4
- Jumper Wires
- Optional: Screw Terminal Block Shield
- Optional: Breadboard Shield
- Optional: Enclosure for Arduino UNO R4
- Optional: Power Splitter
- Optional: Prototyping Base Plate & Breadboard Kit
Note: Builders who want a neat look use a box. It keeps wires safe and makes the project look nice.
Connect the Keypad to Arduino
Connecting a membrane keypad 1×4 to an Arduino feels like plugging in a secret code machine. Wires go in, buttons pop out, and suddenly, your project listens to your every command. Let’s see how to make the magic happen.
Pin Mapping
Keypad Pinout
Every keypad has pins. Each pin has a job. The membrane keypad 1×4 usually comes with five pins. Four pins control the buttons. One pin is common for all buttons. If you flip the keypad over, you see the pins lined up like soldiers ready for action.
| Keypad Pin | Arduino Pin | Description |
|---|---|---|
| Pin 1 | Digital Pin 2 | Connects to key 2 |
| Pin 2 | Digital Pin 3 | Connects to key 1 |
| Pin 3 | Digital Pin 4 | Connects to key 4 |
| Pin 4 | Digital Pin 5 | Connects to key 3 |
| Pin 5 | GND | Common pin for all |
Tip: Double-check the pin numbers. A mix-up can make your keypad act like it’s haunted.
Arduino Pins
The Arduino board waits for signals from the keypad. Each button gets its own digital pin. The common pin goes to GND. This setup helps the Arduino know which button you press. Some people use pins 9, 10, 11, and 12 for the buttons. Others use pins 2, 3, 4, and 5. Both ways work. Just keep your mapping straight.
Wiring Steps
Secure Connections
Wiring the keypad feels like building a tiny bridge between your ideas and the Arduino. Here’s how to connect the keypad:
- Plug the first keypad wire (common pin) into a GND pin on the Arduino.
- Plug the second wire into Digital Pin 2.
- Plug the third wire into Digital Pin 3.
- Plug the fourth wire into Digital Pin 4.
- Plug the fifth wire into Digital Pin 5.
Some builders use Digital Pins 9, 10, 11, and 12 for the buttons. The order does not matter as long as the code matches the wiring.
Note: Use jumper wires for a snug fit. Loose wires can make the keypad act like it’s telling jokes—random and confusing.
For extra safety, use 10kΩ pull-down resistors on each button pin. This keeps the signals steady. Many people use the INPUT_PULLUP setting in their code. This trick uses the Arduino’s built-in resistors. It keeps the setup simple and the wiring neat.
Troubleshooting Tips
Sometimes, the keypad does not work as planned. Maybe a button does nothing. Maybe two buttons act as one. Here are some common problems and how to fix them:
| Common Mistakes | Reasons | Solutions |
|---|---|---|
| Loss of function during use | Metal dome wears out the silver circuit | Use carbon oil and UV ink to protect silver lines |
| Silver circuit at the lead-out part is worn | Add a protective film to the silver circuit | |
| Voltage and humidity cause silver migration | Test conductive inks before use | |
| Panel window is scratched | No protective film on the overlay window | Attach a protective film before use |
| Scratches during mounting | Use scratch-resistant materials | |
| Embossing misalignment | Embossing mold not calibrated | Check molds and silk screen panels |
- Always check the pin mapping before you start the tutorial.
- Make sure the keypad operates within the Arduino’s voltage range.
- Avoid pressing the buttons too hard. Gentle taps work best.
- If the keypad acts up, check the wiring and try using the INPUT_PULLUP setting in your code.
- Implement debouncing in your code to stop the keypad from sending wild signals.
Pro Tip: If your keypad still refuses to work, try swapping the wires or testing each button with a simple code. Sometimes, the smallest wire can cause the biggest headache.
With the wiring done, your arduino membrane keypad setup stands ready for action. The keypad library and code will soon bring your project to life.
Set Up a Keypad in Arduino
Setting up a membrane keypad 1×4 with Arduino feels like unlocking a secret door. The right library and a few lines of code turn button presses into real action. This part of the membrane keypad tutorial shows how to install the keypad library, use its features, and write code that makes the keypad talk to the Arduino.
Keypad Library
Installation
Every great project starts with the right tools. The keypad library helps Arduino understand button presses. Here’s how to get it ready:
- Find the data sheet for the keypad. This shows which pins control which buttons.
- If the data sheet is missing, grab a multimeter. Test each pin to see which ones connect when you press a button.
- Download the keypad library from the Arduino library manager.
- Open the Arduino IDE. Go to “Sketch” > “Include Library” > “Add .ZIP Library” if you downloaded a ZIP file. Or search for “Keypad” in the library manager and click “Install”.
Tip: The data sheet makes wiring easy. If you can’t find it, the multimeter becomes your best friend.
Usage
The keypad library comes packed with features. It listens for button presses, tracks how long you hold a button, and even helps with debouncing. Here’s a quick look at what it can do:
| Feature | Description |
|---|---|
char waitForKey() | Waits until someone presses a key. The program stops until then. |
KeyState getState() | Shows if a key is idle, pressed, released, or held down. |
boolean keyStateChanged() | Checks if a key’s state changed since last time. |
setHoldTime(unsigned int time) | Sets how long you must hold a key before it counts as “held.” |
setDebounceTime(unsigned int time) | Sets how long to wait before reading the next press. Stops double-presses. |
addEventListener(keypadEvent) | Runs a special function when someone presses a key. |
The library makes the setup simple. It handles the hard work, so you can focus on building fun projects.
Example Code
Read Key Presses
The real magic happens when the Arduino reads the keypad. The code below shows how to set up a keypad and read button presses. Each button gets its own pin. When you press a button, the Arduino prints a message.
Here’s a sample code block for reading key presses from a membrane keypad 1×4:
// Define the pins connected to the keypad
const int buttonPins[4] = {2, 3, 4, 5}; // C1, C2, C3, C4

void setup() {
    Serial.begin(9600); // Initialize serial communication for debugging
    for (int i = 0; i < 4; i++) {
        pinMode(buttonPins[i], INPUT_PULLUP);
    }
}

void loop() {
    for (int i = 0; i < 4; i++) {
        if (digitalRead(buttonPins[i]) == LOW) {
            Serial.print("Button ");
            Serial.print(i + 1);
            Serial.println(" is pressed");
            delay(200);
        }
    }
}
This code uses INPUT_PULLUP to keep the wiring simple. Each button press sends a message to the serial monitor.
Serial Monitor Output
The serial monitor acts like a window into the Arduino’s mind. When you press a button, you see a message pop up. For example, pressing the first button shows:
Button 1 is pressed
Try pressing each button. The Arduino will print a new line for every press. If nothing shows up, check the wiring or the code.
Note: The delay in the loop helps prevent the Arduino from reading the same press many times. This is a simple way to debounce the input.
Debouncing Inputs
Keypads sometimes send extra signals when you press a button. This happens because the contacts bounce. To fix this, use debouncing. Software debouncing means adding a short delay in the code, like in the example above. Hardware debouncing uses parts like capacitors or resistors to smooth out the signal. Most builders use software debouncing because it’s fast and easy.
A good membrane keypad tutorial always mentions debouncing. It keeps the arduino membrane keypad working smoothly.
Pro Tip: If your keypad acts jumpy, try increasing the delay or use the library’s setDebounceTime function.
With these steps, anyone can set up a keypad and start building cool projects. The keypad library and the right code make the arduino listen to every button press.
Test and Troubleshoot Membrane Keypad 1×4
Testing a membrane keypad 1×4 on Arduino feels like running a secret agent’s gadget through its paces. Each button press should send a clear signal. If something goes wrong, a few quick checks can save the day.
Testing
Expected Results
When someone presses a button on the keypad, the Arduino should recognize the exact key. The serial monitor lights up with the correct number. The keypad responds fast, and each button works on its own.
char keys[ROWS][COLS] = {{'1','2','3','4'}};
char NasiZnakovi[RED][STUPAC] = {{'1','2','3','4'}};
The numbers 1, 2, 3, and 4 should appear, one for each button. No surprises, no ghosts in the machine.
Key Verification
To test the setup, follow these steps:
- Download the Keypad library from GitHub.
- Include the Keypad library in the Arduino sketch with
#include "Keypad.h". - Define the number of rows and columns for the keypad.
- Set up the character map for the keys.
- Assign the pins connected to the rows and columns.
- Initialize the Keypad object with these settings.
- In the
setup()function, start Serial communication. - In the
loop()function, check for key presses and print the pressed key to the Serial monitor.
If the numbers match the buttons, the setup works. If not, the troubleshooting adventure begins.
Troubleshooting
No Response
Sometimes, the keypad stays silent. No numbers appear. The Arduino acts like it’s on vacation. Here’s what to do:
- Clean the keypad. Remove the keycap and brush away dust or crumbs.
- Inspect the switch. Look for damage or stuck keys.
- Repair or replace. If cleaning fails, swap out the broken switch or get a new keypad.
A clean keypad and healthy switches keep the project running.
Multiple Readings
A single press should mean one signal. If the keypad sends many signals for one press, something needs fixing. The table below shows common causes and solutions:
| Cause | Solution | Difficulty Level |
|---|---|---|
| Loose or unstable USB connection | Re-plug the keyboard | Easy |
| Dust or debris under keys | Clean keyboard with compressed air | Medium |
| Fast repeating key rate | Adjust the repeating key rate | Medium |
| Faulty keycaps | Replace individual keycaps | Easy |
| Malfunctioning switches | Replace switches | Medium |
| Outdated or faulty driver | Update keyboard driver | Easy |
| Unwanted key chatter | Install keyboard-chattering software | Medium |
| Damaged or worn-out cables | Replace cables | Medium |
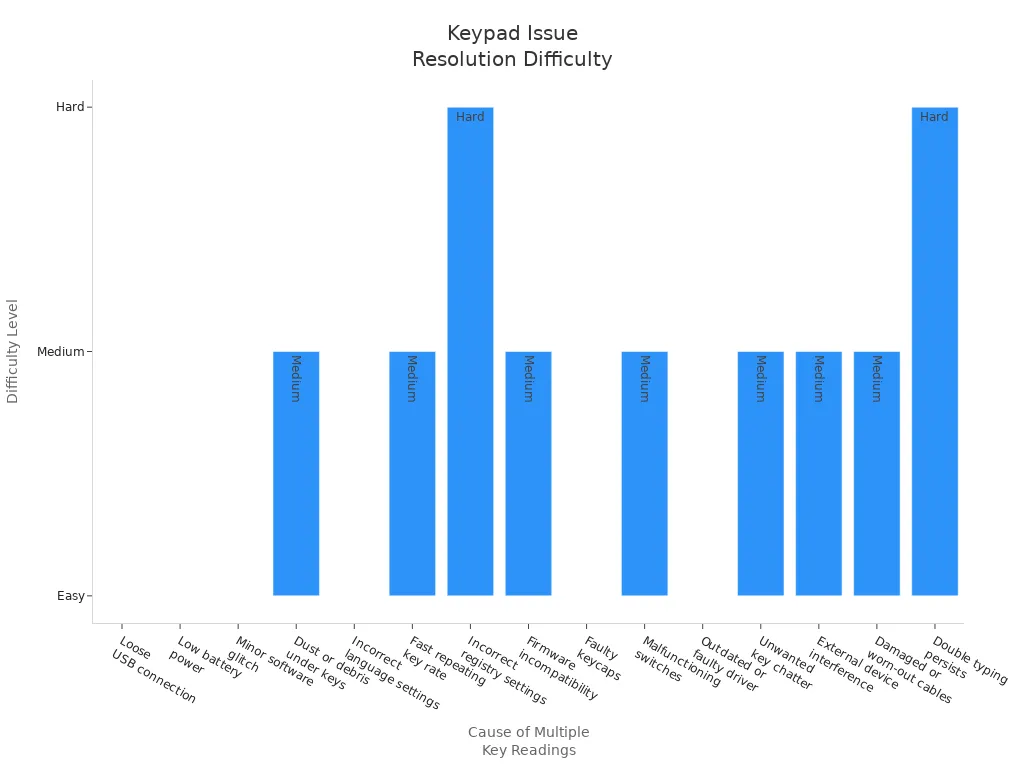
Most problems come from loose wires, dust, or a fast key repeat setting. Builders can fix these with a quick check or a simple adjustment.
Tip: Use INPUT_PULLUP in the code to keep signals steady. Add a short delay to debounce the input. This stops the keypad from acting like it drank too much coffee.
A working membrane keypad 1×4 makes every Arduino project feel smooth. With the right steps, anyone can connect the keypad, set up a keypad, and troubleshoot like a pro. This tutorial helps builders spot problems fast and keep the fun going.
Expand Arduino Membrane Keypad Projects
Project Ideas
Security System
A membrane keypad 1×4 can help make an arduino act like a guard. Builders use these keypads to make password security systems. The keypad goes on the front of a box or door. If someone types the right code, the arduino opens a lock or shows a green light. If the code is wrong, the arduino makes a buzzer sound or flashes red. This keeps out people who should not get in and makes the project feel like a spy gadget.
- Password entry for door locks
- User interface for safe boxes
- Alarm activation and deactivation
The keypad makes security projects feel exciting. Only people with the code can get inside.
Simple Game
Games are more fun with a keypad. The arduino waits for button presses and reacts quickly. Builders make memory games, reaction tests, or guessing games. The keypad lets players enter answers or pick choices. The arduino keeps track of scores and shows results with lights or on a small screen.
- Number guessing games
- Reaction speed challenges
- Simple calculators
Kids and adults both like these games. The keypad turns a simple box into a game machine.
Add Features
Menu Navigation
Projects get better when they have menus. The keypad helps people move through choices. Press one button to go up, another to go down, and another to pick. The arduino reads each press and changes the menu on a screen. This works well for settings, timers, or music players.
Tip: The keypad library makes moving through menus simple. Builders can write code that listens for each button and updates the menu right away.
Module Integration
Keypads work well with other modules. Builders connect screens, buzzers, or Wi-Fi modules to the arduino. The keypad sends commands, and the arduino controls the modules. This setup can make smart home controls, remote sensors, or special gadgets.
Here’s a table with features that make keypad projects better:
| Feature | Description |
|---|---|
| Tactile Feedback | Gives a click when pressed, so users know the button worked. |
| Waterproof Keypad | Keeps water and dust out, perfect for outdoor or kitchen projects. |
| Sound/Light Indicators | Adds beeps or lights for feedback, making the keypad more fun and easy to use. |
A membrane keypad 1×4 fits in many projects. Builders use it for security, games, and controls. With the right setup and some ideas, any arduino can do more. This tutorial shows how to connect, code, and add new features.
Resources for Membrane Keypad 1×4
Where to Buy
SOUSHINE
People who want a SOUSHINE membrane keypad look in Guangdong, China. Shops in Shenzhen and Dongguan sell these keypads to people everywhere. You can find SOUSHINE keypads on big websites like Alibaba. Some buyers meet sellers at trade shows like the Canton Fair. Every shop ships keypads to North America and Europe using trusted delivery companies. How long shipping takes depends on where you live, but most orders come fast.
- Shops in Shenzhen and Dongguan have SOUSHINE membrane keypads.
- Alibaba has lots of choices for buyers.
- Canton Fair lets buyers and sellers meet in person.
- Shipping goes to North America and Europe.
Tip: If you want your keypad quickly, ask about express shipping. Sellers usually give tracking for every order.
Other Brands
Some people want to try other brands for their projects. Many online stores sell membrane keypads for arduino and electronics. The table below shows popular places and what they sell.
| Source | Description |
|---|---|
| Techiesms | 4×4 Matrix Membrane Type Keypad Switch for Arduino, ARM, and MCU |
| Vayuyaan | 4×4 Matrix Keypad Membrane Switch for Arduino and NodeMCU |
| Amazon | DIYmalls Keypad Membrane Keyboard for Arduino |
Shoppers look at prices and features before buying. Each store gives details about the keypad so builders can choose the best one.
Tutorials
Community Support
People who use membrane keypads get help from the internet. Tutorials show every step. These guides list the parts, wiring pictures, and code examples. Builders learn how to connect the keypad, write code, and test their work. Some tutorials have links to buy keypads, making things easier.
- Tutorials teach how to set up a membrane keypad 1×4 with arduino.
- Guides show wiring pictures and sample code.
- Builders find more places to buy keypads.
- Forums answer questions and share tips.
Note: Builders who join forums meet others who like electronics. They share ideas, help fix problems, and show finished projects. The community helps everyone learn new things faster.
People who want to start new projects with membrane keypads find everything online. Stores, guides, and forums make building easy and fun.
Setting up a membrane keypad 1×4 with arduino makes projects fun and interactive. Builders do these steps to get things working:
- Put in the keypad library.
- Attach the keypad wires to the right pins.
- Write easy code to show which key is pressed.
- Use password protection with lights and relays.
New builders sometimes mix up wires or have code problems. They fix these by checking which pins go where and making sure the code matches the diagram. Makers use SOUSHINE Membrane Switches to try new things, share what happens, and join arduino forums to get help and ideas. 🎉
FAQ
How many buttons does a 1×4 membrane keypad have?
A 1×4 membrane keypad has four buttons. Each button sits in a row, ready for action.
Can someone use a membrane keypad with arduino?
Yes! Builders connect the keypad to arduino with jumper wires. The setup takes only a few minutes.
What happens if a button does not work?
Check the wires first. Clean the keypad. Replace the button if needed. Most problems disappear after a quick fix.
Is the SOUSHINE membrane switch waterproof?
The SOUSHINE membrane switch keeps water out. It works well in kitchens, labs, and outdoor projects.
How does someone clean a membrane keypad?
Wipe the surface with a soft cloth. Avoid strong cleaners. The keypad stays fresh and ready for more presses.
Can a keypad control lights or buzzers?
Yes! Builders use the keypad to turn on lights, sound buzzers, or unlock doors. The keypad sends signals to arduino for each action.
Where can someone buy a SOUSHINE membrane keypad?
Shops in Shenzhen and Dongguan sell SOUSHINE keypads. Online stores like Alibaba also offer fast shipping.
What is debouncing in keypad projects?
Debouncing stops extra signals when someone presses a button. Builders add a short delay in the code to keep things smooth.