Call us: +86-137-2353-4866
Connecting a membrane keypad to Arduino is easy. The SOUSHINE membrane switch is tough and simple to use. Beginners think it is easy and can be used in many ways. Membrane keypads are found in lots of devices people use daily. These devices are control panels, medical tools, remote controls, and home machines. The sealed top keeps water and dust out. This helps the keypad work for a long time.
Table of Contents
Key Takeaways
- Membrane keypads last a long time and are simple to clean. They work well in many places, like medical devices and control panels.
- The SOUSHINE Membrane Switch has a sealed design. This keeps out dust and water. It helps the keypad last longer.
- To connect a 4×4 membrane keypad to an Arduino, you need eight digital pins. Make sure your board has enough pins before you begin.
- Use an 8-pin Dupont cable for a tidy and safe connection. This helps keep wires from getting tangled between the keypad and Arduino.
- It is important to test the keypad. Use the Serial Monitor to see if each button works when pressed.
- If keys do not work, it is often because of loose wires. Check all the wiring before you try other fixes.
- You can add LEDs or displays to your keypad project. This makes it more fun and gives users quick feedback.
- Use online guides and tutorials to help with your projects. They make learning and fixing problems much easier.
Membrane Keypad Overview
What Is a Membrane Keypad
The SOUSHINE Membrane Switch is special among keypads. It uses SMD technology to make it more accurate and dependable. The keypad has several layers. The top layer shows the keys and pictures. Below that, there are more layers. These layers include the top circuit, a spacer, and the bottom circuit. When you press a key, it sends a signal. The design lets you use it often. It lasts a long time.
The sealed design keeps out dust, water, and chemicals. This helps the keypad work in hard places. People in factories and labs trust it. Cleaning is simple. You can wipe the surface quickly.
- SMD technology
- Made for lots of use
- Lasts a long time
- Sealed and simple to clean
- Custom graphics and shapes
How a Membrane Keypad Works
A keypad works by closing a circuit when you press a button. The top layer bends and pushes a pad through the spacer. The pad touches the bottom layer and closes the circuit. The microprocessor gets a signal. It knows which button you pressed.
| Step | Description |
|---|---|
| Initial State | The switch is open. No current moves between pads. |
| Actuation | Pressing a key bends the top layer. The pad goes through the spacer hole. |
| Circuit Closure | The pad touches the bottom layer. The circuit closes. |
| Signal Transmission | The closed circuit sends a signal to the microprocessor. The input is recorded. |
You can feel a click or pop when you press some keypads. Some keypads do not give a feeling. They use lights or sounds instead. Tactile domes make the keys move. People like the quick response.
| Feature | Tactile Feedback | Non-Tactile Feedback |
|---|---|---|
| Physical Response | Click or pop | Lights or sounds |
| User Interaction | Direct feedback | May not feel as good |
| Customization | Different forces for pressing | Fewer choices |
| Mechanical Movement | Yes, with domes | No movement |
Most keypads need a light touch, about 35g to 45g, for fast typing. Typing uses 50g to 60g. More than 60g means it is harder to press.
Applications
Membrane keypads are used in many fields. Farms, factories, transport, food service, and electronics use them daily. The sealed design keeps them safe from harm. This makes them great for machines.
- Consumer Electronics: Remote controls, calculators, and handheld devices use keypads for easy input.
- Industrial Controls: Machines and control panels use keypads because they last.
- Medical Devices: Medical tools use keypads since they are easy to clean.
- Automotive Industry: Cars use keypads for climate and entertainment controls.
Membrane keypads are found in control systems and small gadgets. You see them in phones and kitchen tools. They last and need care in different ways than mechanical keypads.
| Keypad Type | Lifespan | Keystroke Rating | Maintenance Requirements |
|---|---|---|---|
| Mechanical Keypads | 10 to 15 years | 50 to 100 million | Clean often, replace parts if needed. |
| Membrane Keypads | 1 to 2 years | About 5 million | Clean less often, replace the whole keypad if broken. |
The SOUSHINE Membrane Switch works for many jobs. It is good for tough places and is easy to clean. People pick it because it is reliable and simple to use.
Materials for Arduino Keypad Projects
SOUSHINE Membrane Switch
The SOUSHINE Membrane Switch stands out in every project. It has a flat surface with printed keys. The top layer shows numbers and symbols. Underneath, thin sheets connect each button to the circuit. When someone presses a key, the switch sends a signal. The sealed design keeps water and dust away. Cleaning takes only a few seconds. People use this switch in medical devices, control panels, and home gadgets. The flexible shape fits many designs. The switch works well in tough places. It lasts through many presses.
| Feature | Description |
|---|---|
| Surface | Flat, easy to clean |
| Layers | Multiple, flexible |
| Durability | Withstands heavy use |
| Customization | Fits many layouts |
Arduino Board
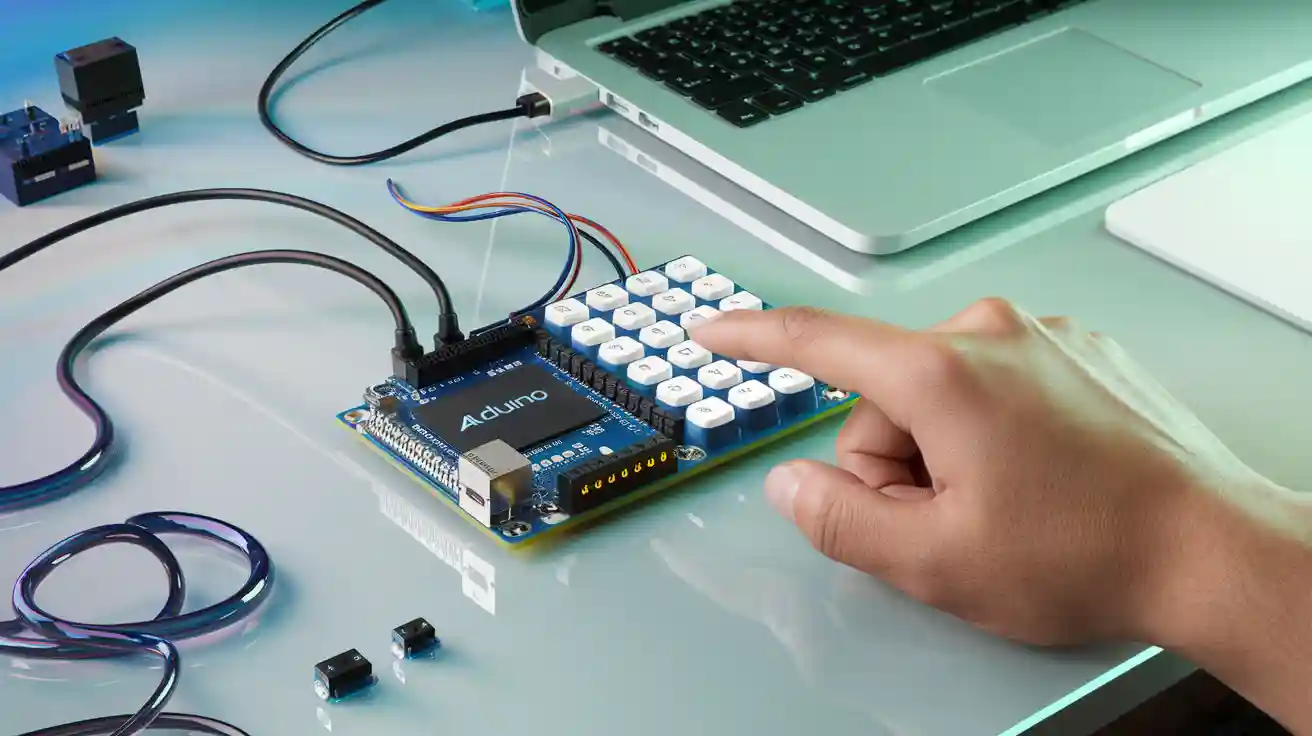
The Arduino board acts as the brain of the project. It reads signals from the keypad and decides what happens next. Makers choose boards with enough digital pins. A 4 x 4 membrane keypad needs eight free digital pins. Row pins connect to pins 2, 3, 4, and 5. Column pins connect to pins 6, 7, 8, and 9. The board works with many sensors and modules. People use it for learning, building, and testing ideas. The board runs on USB power or batteries. It fits on a desk or in a small box.
Tip: Always check the number of free digital pins before starting. The right board makes wiring simple.
- An Arduino compatible board with 8 free digital pins
- A 4 x 4 Membrane Keypad
- Row pins connected to digital pins 2 to 5
- Column pins connected to digital pins 6 to 9
8-Pin Dupont Cable
The 8-pin Dupont cable keeps wires neat. Each wire has a small connector at the end. The cable links the keypad to the Arduino board. People use it to avoid tangled wires. The colors help match each pin to the right spot. The cable snaps into place and stays secure. Makers like the cable because it saves time. It works with breadboards and headers. The cable fits inside cases and boxes.
| Cable Type | Use Case | Benefit |
|---|---|---|
| 8-Pin Dupont | Keypad to Arduino | Neat, easy setup |
| Single Wires | Custom connections | Flexible, slower |
People who build projects use the cable for quick changes. The cable helps beginners avoid mistakes. It makes the whole setup look clean.
Other Essentials
Every project needs a few extra tools and supplies. These items help builders connect, test, and finish their Arduino keypad setup. Without them, the project might stall or get messy. Here are the must-haves for a smooth build:
1. Breadboard
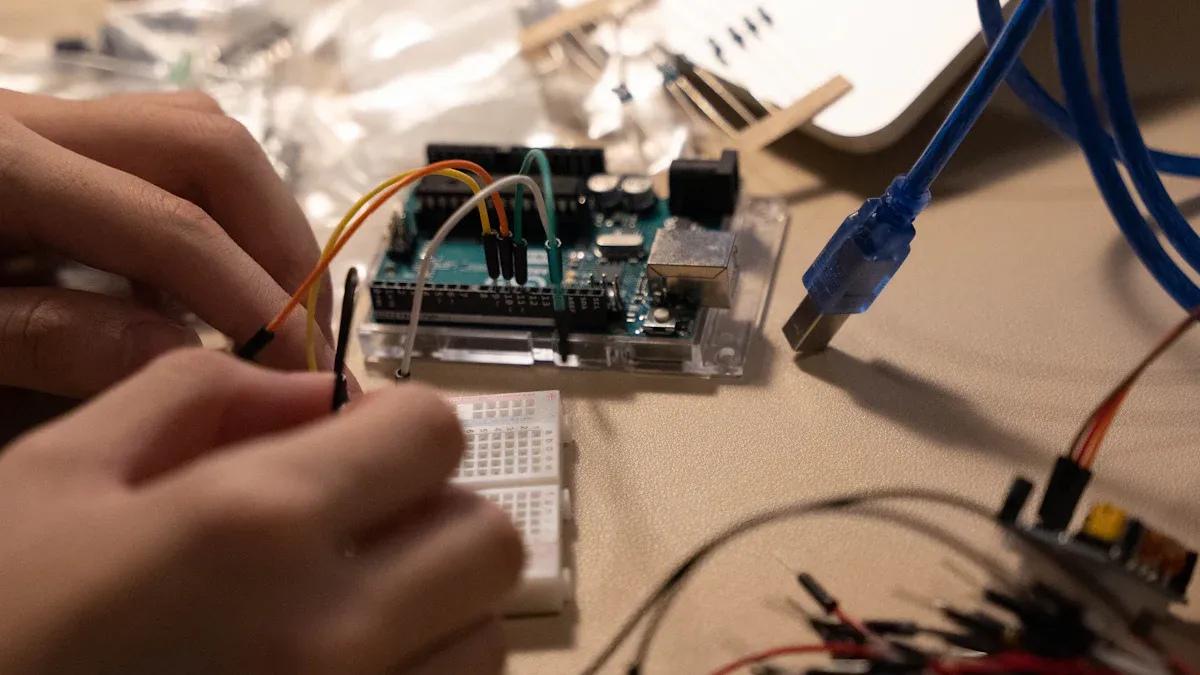
A breadboard acts like a playground for wires and components. It lets users test circuits without soldering. Builders can move wires around and fix mistakes fast. The breadboard keeps everything in place. No more wires falling out or getting lost.
2. Jumper Wires
Jumper wires jump from one spot to another. They connect the Arduino, keypad, and breadboard. Builders use them to make quick changes. The wires come in many colors. This makes it easy to follow each connection. Short wires fit tight spaces. Long wires reach across the board.
3. Resistors
Some projects need resistors. These small parts control the flow of electricity. They protect the Arduino and keypad from too much current. Builders pick the right value for each job. A 10k ohm resistor works well for pull-down or pull-up tasks.
4. Computer
A computer brings the project to life. Builders use it to write code and upload it to the Arduino. The computer also helps with testing. If something goes wrong, the computer shows error messages. Builders can fix problems right away.
5. USB Cable
A USB cable links the Arduino to the computer. It sends power and code. Builders use it to upload sketches and check the serial monitor. The cable must fit the Arduino’s port. Most boards use a standard USB-B or micro USB.
6. Power Supply (Optional)
Some projects need more power. A battery pack or wall adapter keeps the Arduino running when not plugged into a computer. Builders pick the right voltage for their board.
Tip: Keep a small toolbox for these essentials. It saves time and keeps the workspace tidy.
| Item | Purpose | Why It Matters |
|---|---|---|
| Breadboard | Test circuits | No soldering needed |
| Jumper Wires | Make connections | Easy to change layout |
| Resistors | Control current | Protects components |
| Computer | Write and upload code | Runs the project |
| USB Cable | Connect Arduino to computer | Transfers code and power |
| Power Supply | Extra power (optional) | Runs away from computer |
With these essentials, builders can start, test, and finish their Arduino keypad project. Each item plays a key role. The right tools make the job easier and more fun. Builders who prepare these items first avoid delays and enjoy the process.
Connecting the Arduino to the Keypad
4 x 4 Membrane Keypad Pinout
A 4×4 matrix membrane keypad has eight pins. Four pins control the rows, and four pins control the columns. Each pin has a job. The table below shows how each pin connects to the keypad.
| Pin Type | Pin Number | Description |
|---|---|---|
| Row | 3 | Connects to ROW1 |
| Row | 4 | Connects to ROW2 |
| Row | 5 | Connects to ROW3 |
| Row | 6 | Connects to ROW4 |
| Column | 7 | Connects to COL1 |
| Column | 8 | Connects to COL2 |
| Column | 9 | Connects to COL3 |
| Column | 10 | Connects to COL4 |
Each pin matches a row or column. The keypad uses these pins to send signals to the arduino. When someone presses a button, the keypad closes a circuit between a row and a column.
Wiring Steps
Rows and Columns
People set up a keypad by connecting each pin to the right spot on the arduino. The 8-pin Dupont cable helps keep wires tidy. The table below shows a common way to connect the keypad pins to the arduino pins.
| Keypad Pin | Arduino Pin |
|---|---|
| 8 | 5 |
| 7 | 4 |
| 6 | 3 |
| 5 | 2 |
| 4 | 9 |
| 3 | 8 |
| 2 | 7 |
| 1 | 6 |
People start by plugging the keypad pins into the Dupont cable. They match each wire to the correct arduino pin. The rows go to pins 2, 3, 4, and 5. The columns go to pins 6, 7, 8, and 9. This setup helps the arduino read each button press.
Checking Connections
People check their work before turning on the arduino. They follow these steps to make sure every wire is in the right place:
- Connect the C1, C2, C3, and C4 pins of the keypad to digital pins on the arduino (for example, D2, D3, D4, D5).
- Enable internal pull-up resistors on the arduino to detect button presses.
- Use a simple program to read the state of each pin and see which button is pressed.
People look for loose wires or mixed-up pins. They fix mistakes before testing the keypad. This step saves time and stops problems later.
Tips for Secure Setup
People want a keypad that works every time. They use these tips to set up a keypad and keep it running smoothly:
Tip: Use pull-down resistors on input pins. This stops floating states and keeps signals clear.
- Diodes help prevent ghosting. Ghosting happens when pressing two keys makes other keys look pressed.
- People keep wires short and neat. Long wires can pick up noise and cause errors.
- They label each wire. Labels help when fixing or changing the setup.
- People test each button after wiring. They press every key and watch the arduino respond.
Proper pin mapping makes the connection strong. The arduino reads each button press without mistakes. This accuracy keeps the project working well. People who connect the keypad with care enjoy reliable results.
People use a membrane keypad in many projects. They follow these steps to connect the keypad and set up a keypad for games, locks, and more. The 4 x 4 membrane keypad works with the arduino and gives fast, clear input.
Arduino Keypad Programming
Programming the keypad with an arduino feels like unlocking a secret code. The process starts with the right tools and a few simple steps. Anyone can bring a 4 x 4 membrane keypad to life with a little patience and a sense of adventure.
Installing Keypad Library
Every great project needs the right library. The keypad library helps the arduino understand button presses. To install keypad library, follow these steps:
- Download the keypad library from the official Arduino website or trusted source.
- Open the Arduino IDE and go to the “Sketch” menu.
- Select “Include Library” and then “Add .ZIP Library.”
- Choose the downloaded file and click “Open.”
- The library now appears in the list, ready for action.
Tip: If the library does not show up, restart the Arduino IDE. Sometimes, computers need a little nudge.
Uploading Example Code
With the keypad library installed, the next step is to test the setup. The arduino IDE comes with example sketches that make this easy. Select “File,” then “Examples,” and find the keypad folder. Pick a sketch that matches the keypad layout.
Copy the sketch into the editor. Plug in the arduino. Click the upload button. The sketch travels from the computer to the board. If everything works, the keypad responds to each press.
Common issues can pop up during this step:
- Unresponsive keys often mean loose wires or wrong pin connections.
- Ghosting appears when pressing two or more keys at once. The keypad might register extra keys.
- Interference can cause strange behavior. Moving the keypad or using shielded cables helps.
Note: Always double-check the wiring before uploading the sketch. A quick check saves time and frustration.
Customizing for Your Keypad
Every keypad has its own personality. Some want a little extra attention to work perfectly with the arduino.
Adjusting for 4 x 4 Layout
The sketch must match the keypad’s layout. For a 4 x 4 membrane keypad, set the number of rows and columns to four each. In the sketch, look for lines like:
const byte ROWS = 4;
const byte COLS = 4;
Change these numbers if the keypad has a different size. The arduino reads the keypad correctly when these values match.
Key Mapping
Key mapping tells the arduino which button sits where. In the sketch, a two-dimensional array holds the key values. For example:
char keys[ROWS][COLS] = {
  {'1','2','3','A'},
  {'4','5','6','B'},
  {'7','8','9','C'},
  {'*','0','#','D'}
};
Change the characters to match the keypad’s labels. Programming the keypad becomes fun when each button does exactly what the user wants.
With the right keypad library, a good sketch, and a little tweaking, anyone can turn a simple keypad into a powerful input device. The arduino and keypad make a great team for any project.
Testing and Troubleshooting
Testing the Keypad
Testing the keypad brings the project to life. Plug in the Arduino and open the Serial Monitor in the Arduino IDE. Press each button on the keypad one by one. Watch the Serial Monitor for the correct character or number. If the display matches the button, the wiring and code work well. If nothing appears, something needs fixing. Testing each button helps spot problems early. People often use a simple sketch that prints the key value to the screen. This step makes sure every button sends the right signal.
Tip: Press each key slowly. Hold it for a second. This helps catch any missed presses or double entries.
Common Issues
Problems can sneak into any project. The keypad sometimes acts up, but most issues have simple fixes.
No Response
Sometimes, the keypad stays silent. No lights, no numbers, just quiet. People often see this when a wire slips out or a pin connects to the wrong spot. Here are the most frequent issues and how to solve them:
- Check every connection. Make sure each wire sits tight in its place.
- Clean the membrane keypad surface. Dirt can block signals.
- Test continuity with a multimeter. This tool checks if electricity flows through the keypad.
Wrong Keys
Pressing “1” but seeing “A” on the screen? The keypad might have mixed-up wires or a code mismatch. Wrong keys often mean the row and column pins swapped places. People fix this by:
- Double-checking the pin mapping in the code.
- Swapping wires on the Arduino until the keys match the display.
- Reviewing the key mapping array in the sketch.
Erratic behavior sometimes pops up. The keypad might flash random numbers or act wild. Physical damage or a loose connection can cause this. Resetting the Arduino or updating the code often solves the problem. Ghosting, where pressing two keys lights up a third, usually means the wiring needs a closer look. Shielded cables or insulating tape between buttons can help.
Debugging Tips
Debugging turns a tricky project into a smooth one. People use several tools and tricks to find errors fast.
- The compiler in the Arduino IDE checks for code mistakes. It points out missing semicolons or typos.
- The Serial Monitor shows what the program does in real time. People print out variables and see which key the Arduino reads.
- Visual Micro, a plugin for Visual Studio, gives more advanced debugging options.
- DebugWire helps with microcontrollers like ATTiny or ATmega. It finds hardware bugs without extra wires.
- Atmel Studio supports Arduino files and offers strong debugging features.
Note: Print out the value of each key press. This simple step often reveals where things go wrong.
Testing and troubleshooting make the difference between a working project and a frustrating one. With a little patience and the right steps, anyone can master the keypad.
Project Ideas with Membrane Keypad
Simple Projects
People love building with a keypad. Beginners start with easy projects. They create their own membrane matrix keypad and connect it to an Arduino. This project costs little and lets users design their own button layout. Makers often build a simple password entry system. The keypad unlocks a box when the right code is entered. Some use the keypad to control a small robot. Each button moves the robot in a different direction. Others set up a counter. Pressing a button increases or decreases the number on a screen.
- Build a custom keypad for games.
- Make a basic calculator.
- Set up a password-protected box.
- Control a robot with button presses.
- Create a counter for scores or steps.
Tip: Start with a simple keypad project. Test each button. Watch how the device responds.
Expanding with LEDs or Displays
People add LEDs and screens to make keypad projects more exciting. A password-protected door lock uses a keypad to enter the code. When the right code is pressed, a servo unlocks the door. LEDs flash to show if the password is correct or wrong. Some makers design a calculator. The keypad lets users enter numbers. The result appears on an LCD display. Game controllers use the keypad for actions. Each button triggers a move or sound. Music players use the keypad to play songs. Each button starts a different tune.
| Project Type | Keypad Role | Extra Feature |
|---|---|---|
| Door Lock | Enter password | LED feedback, servo |
| Calculator | Input numbers | LCD display |
| Game Controller | Control actions | Sound effects |
| Music Player | Select songs | Speaker output |
People often connect the keypad to an LCD. The screen shows what they type. In an authentication system, the keypad lets users enter a password. The LCD displays the entry for confirmation. This setup helps users see their input and know if the device accepts it.
// Example: Show keypad input on LCD
lcd.print(key);
Note: Adding LEDs or displays makes keypad projects more interactive. Users see instant feedback.
More Learning Resources
People find many guides online for keypad projects. These resources help beginners learn fast. Guides show how to wire a 4×4 membrane keypad to Arduino. Diagrams and code examples make each step clear. Some tutorials explain how to connect the keypad with jumper wires. Sample code helps users recognize key presses. Authors share their first experiences with keypads. They give step-by-step instructions for building a 1×4 keypad project.
- Guides with wiring diagrams and code.
- Tutorials for connecting keypads with jumper wires.
- Sample code for reading key presses.
- Stories from makers who learned by trial and error.
- Step-by-step instructions for assembly.
Tip: Use online guides to solve problems. Follow diagrams and test code to learn quickly.
They saw how to connect a membrane keypad to Arduino, test it, and make it work. SOUSHINE Membrane Switches turn simple ideas into fun projects. Makers trust these keypads for games, locks, and gadgets. The keypad stands strong in many places. Readers can try new builds and share wild stories or questions below. 🚀
FAQ
How does someone clean a SOUSHINE Membrane Switch?
A person wipes the surface with a damp cloth. The sealed design keeps water out. No special cleaner needed. The keypad looks fresh after a quick wipe.
Can a beginner connect the keypad without soldering?
Yes! A beginner uses an 8-pin Dupont cable. The cable snaps in place. No soldering iron required. The setup stays neat and safe.
What happens if a key stops working?
A person checks the wires first. Loose connections cause trouble. If the problem stays, swap the keypad. The SOUSHINE Membrane Switch handles many presses.
Does the keypad work outdoors?
Yes. The sealed layers block dust and water. The keypad survives rain and mud. People use it in gardens, workshops, and playgrounds.
Can someone use the keypad for a game project?
Absolutely! The keypad controls moves, scores, or actions. Kids build game controllers with it. The buttons respond fast. The fun never stops.
What Arduino board fits best with a 4×4 keypad?
An Arduino Uno fits well. It has enough digital pins. Makers use it for keypad projects. The board handles signals with ease.
How does someone fix ghosting on the keypad?
A person adds diodes to the circuit. Diodes block unwanted signals. The keypad reads only the pressed keys. The game stays fair.
Is it possible to customize the keypad layout?
Yes! SOUSHINE offers custom graphics and shapes. People choose numbers, letters, or symbols. The keypad matches any project style.